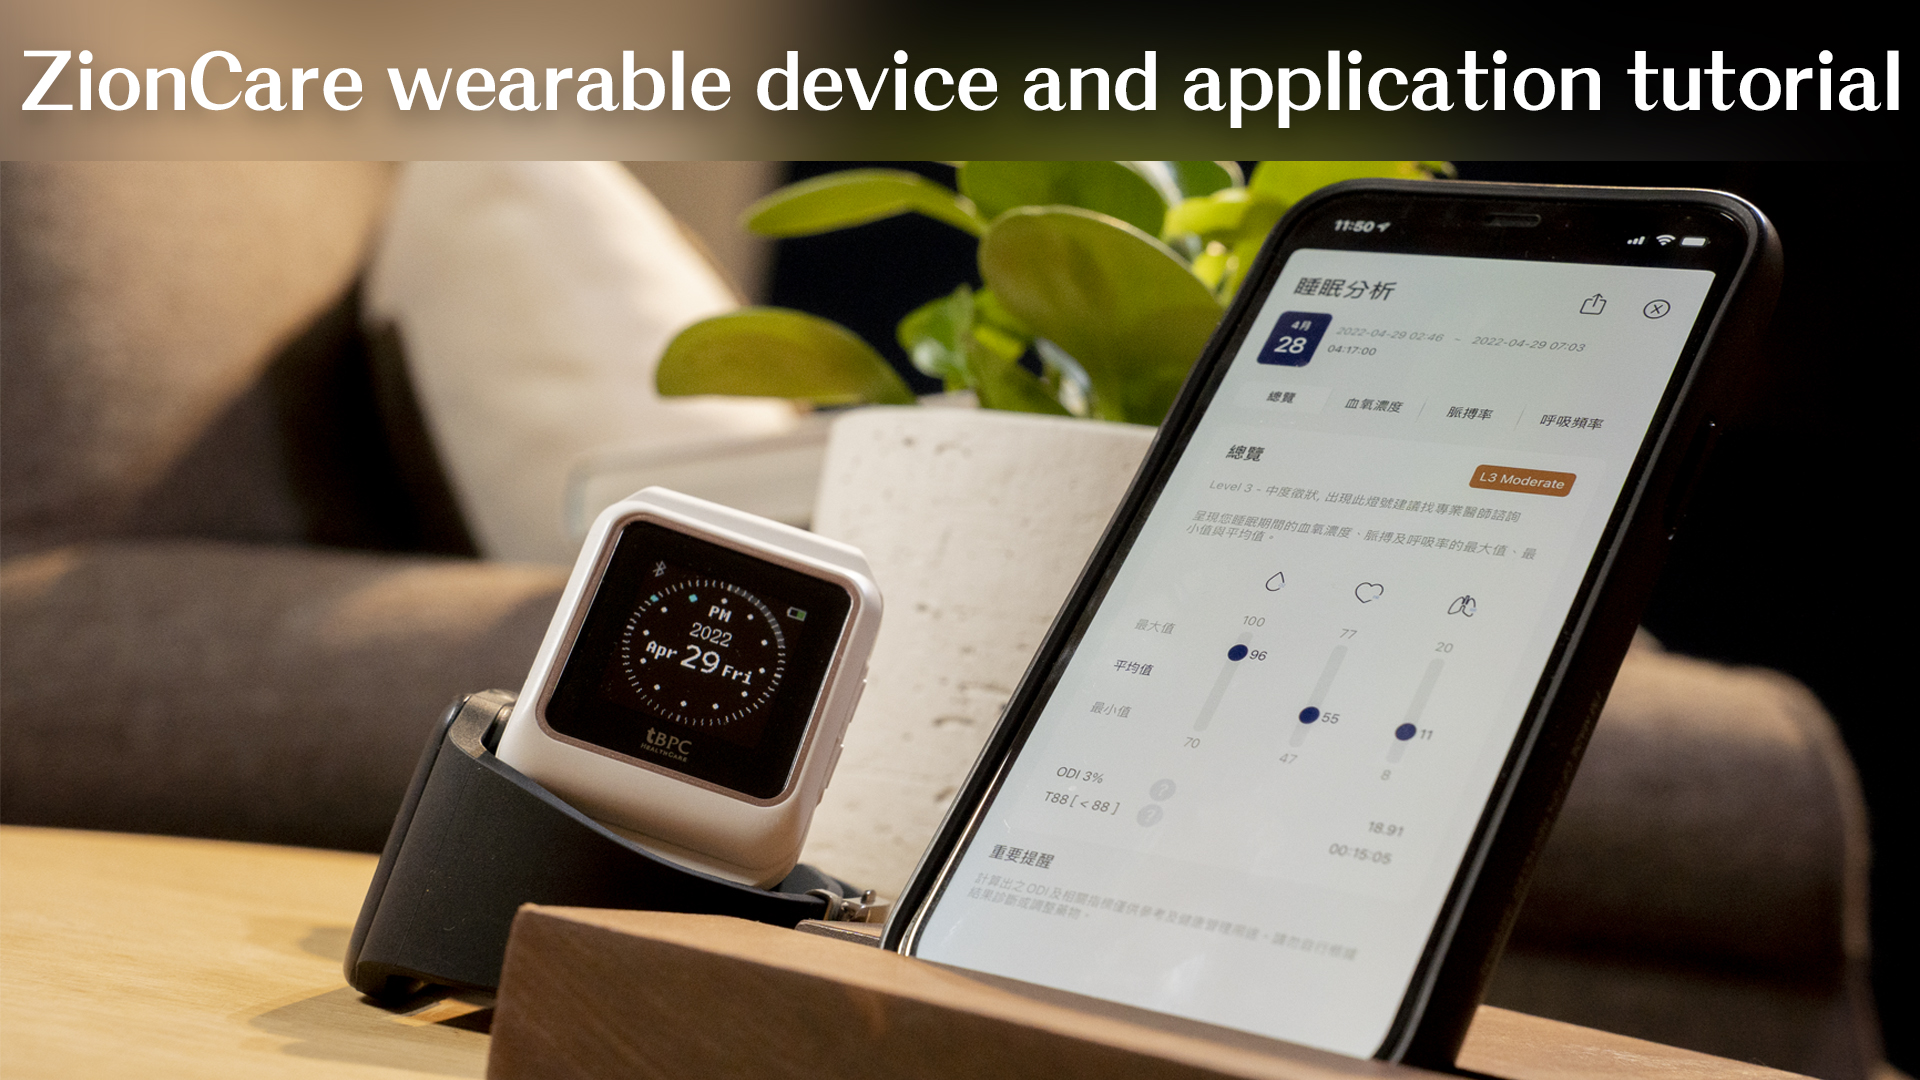
ZionCare 應用程式與臺醫腕錶 (oCare Pro 100) 使用教學
ZionCare App與穿戴裝置教學(tBPC)
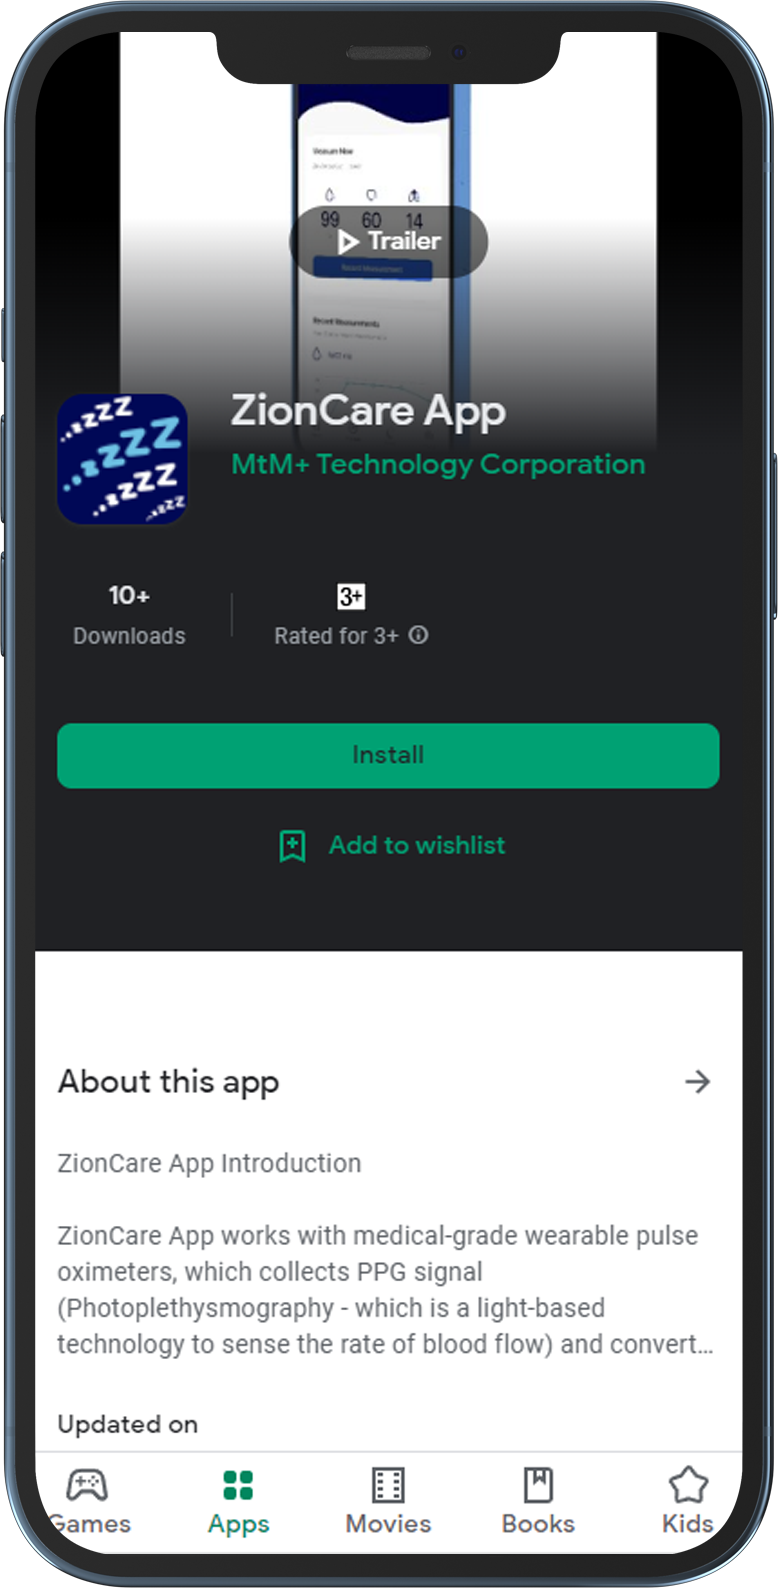
- Search for ZionCare on Google Play or App Store.
- You can download and install it.
- After the installation is complete, you can open the App.
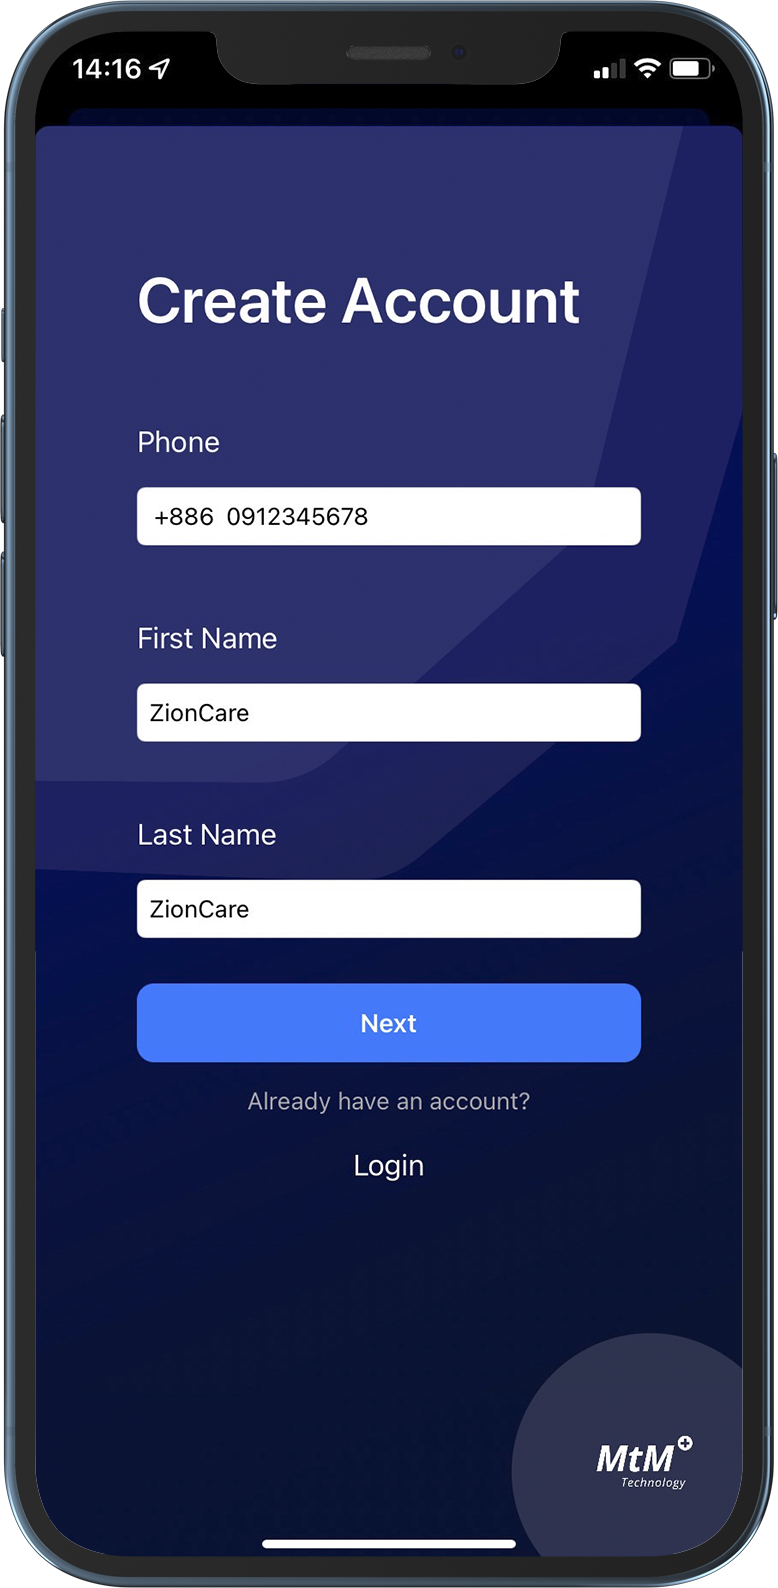
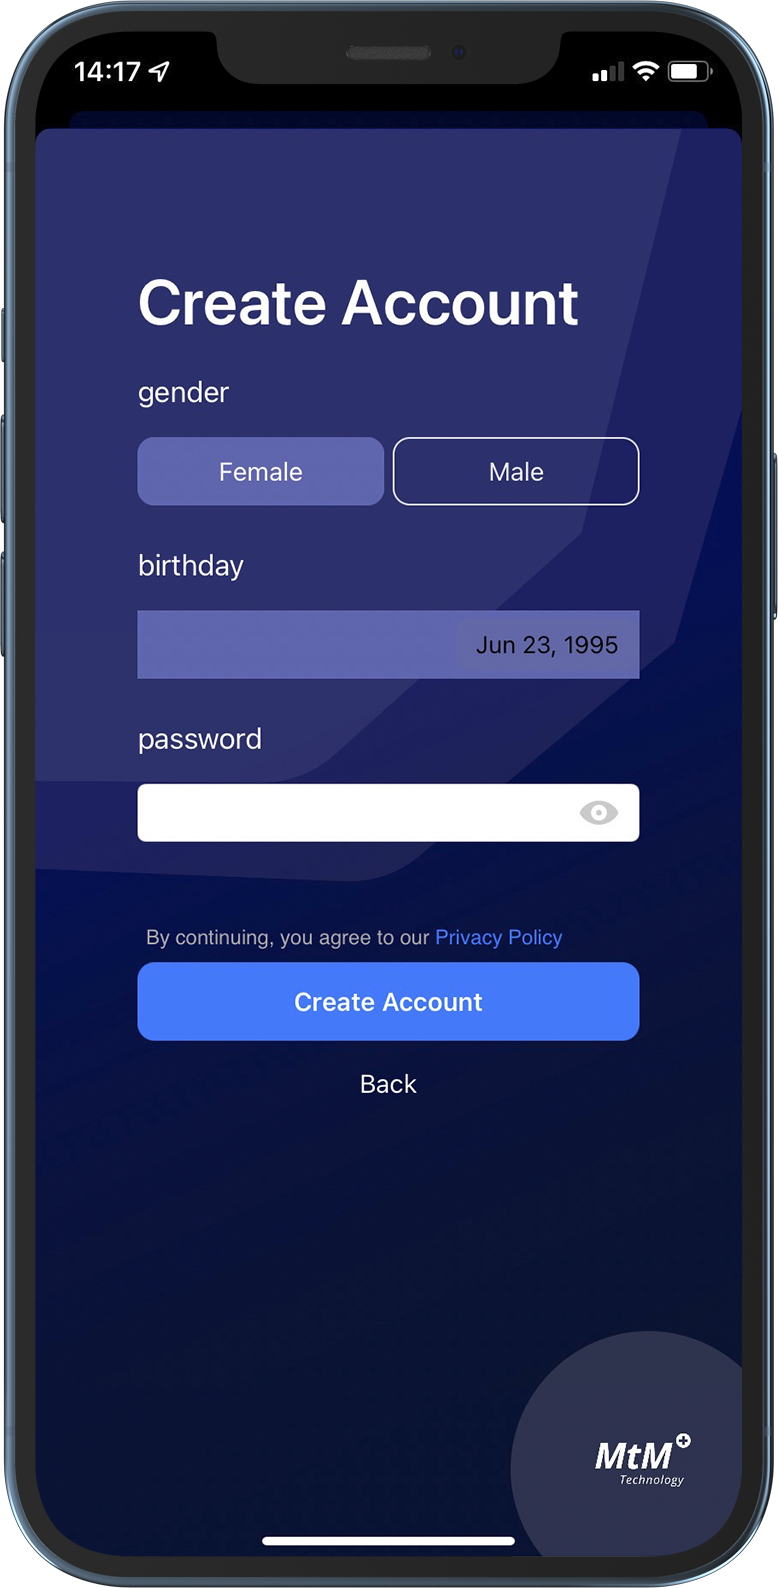
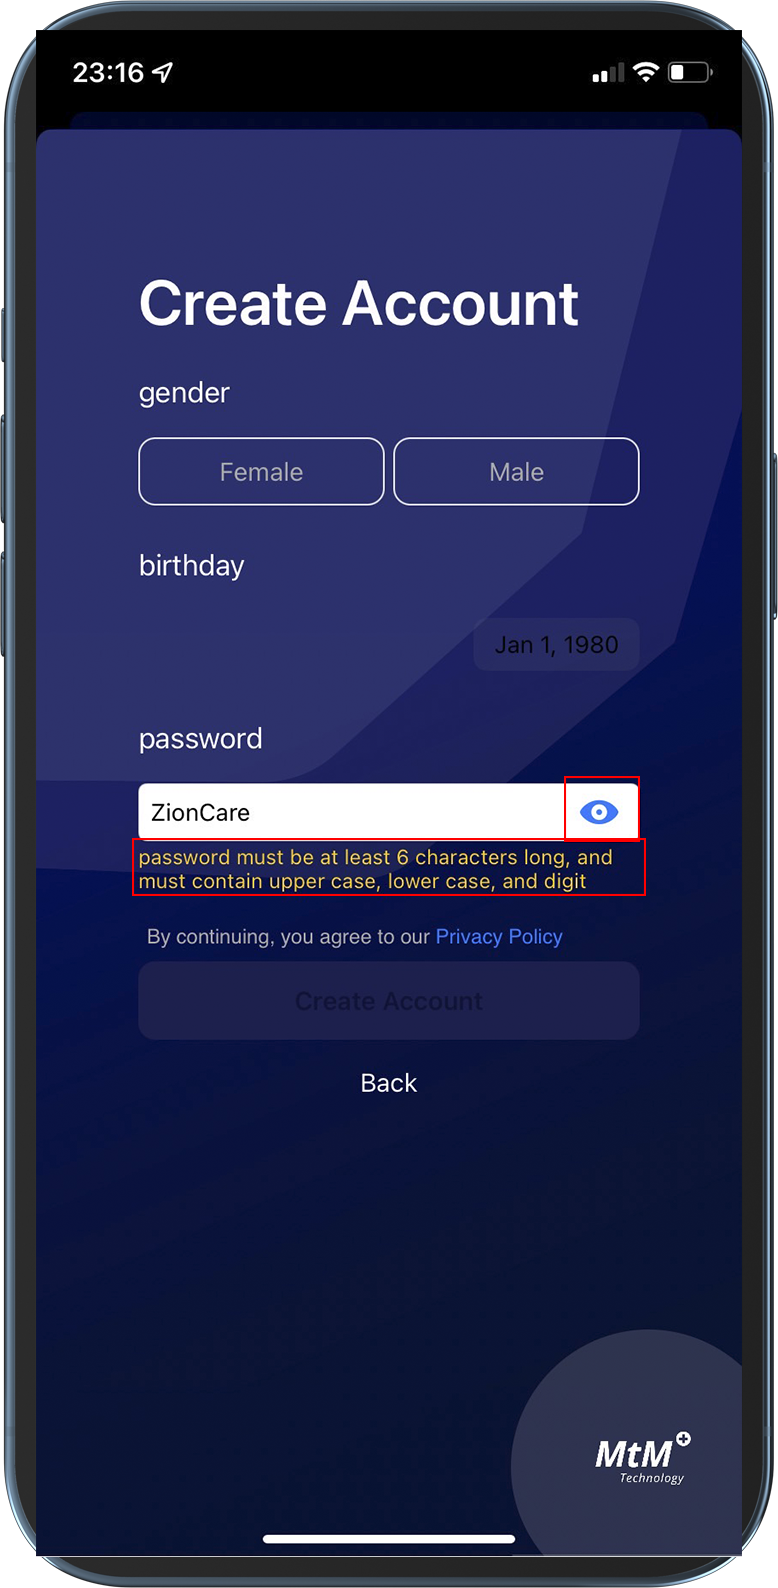
- Select your mobile phone or email address to register and enter your name.A
- Then enter the details. The password must contain uppercase and lowercase English and numbers.
- Once you receive the verification code and enter it, you can complete your registration.
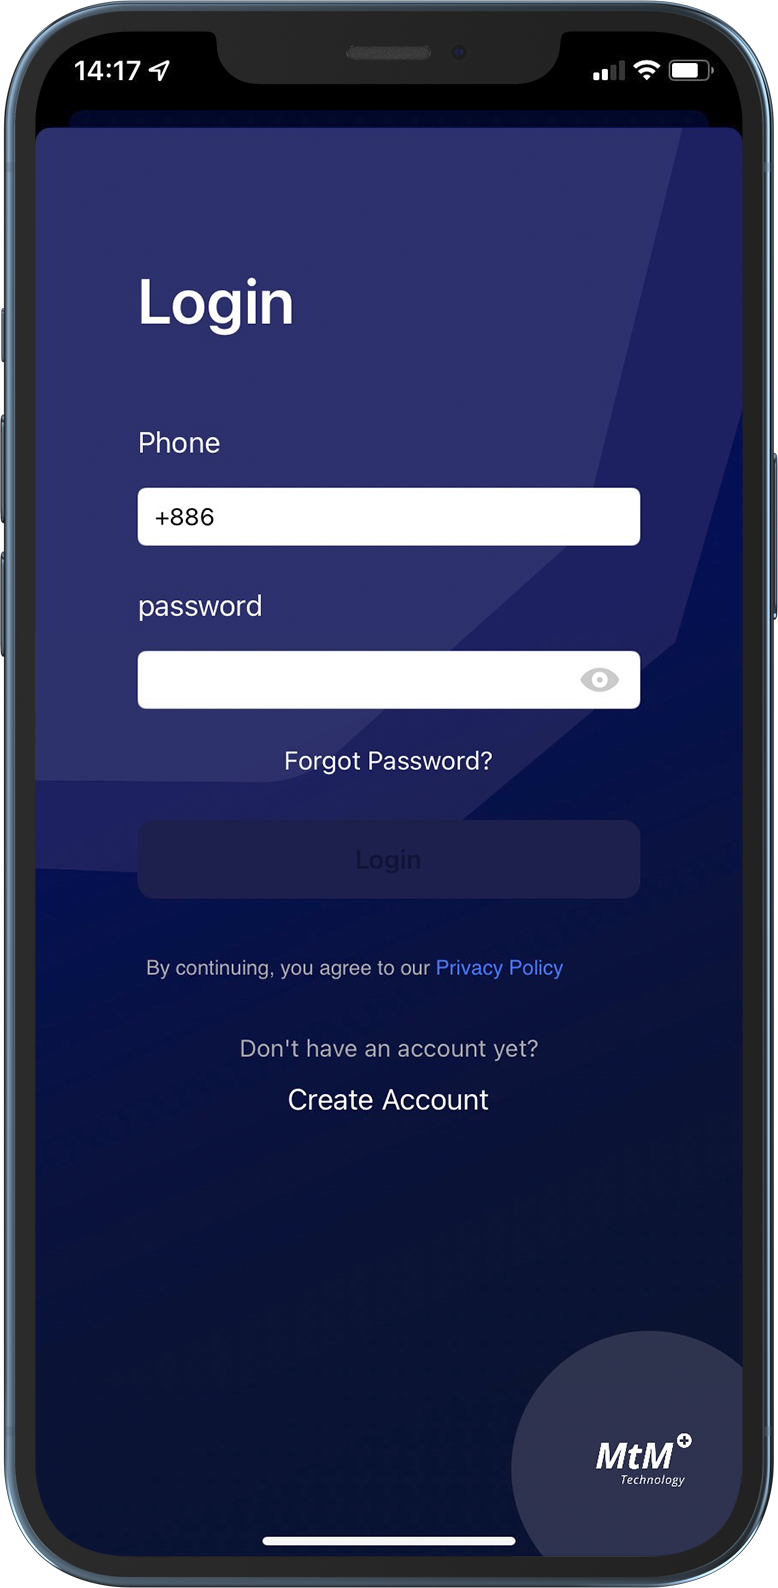
- Please log in first after installing the App.
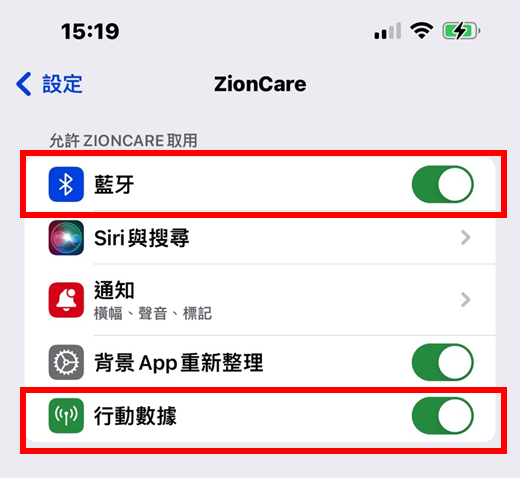
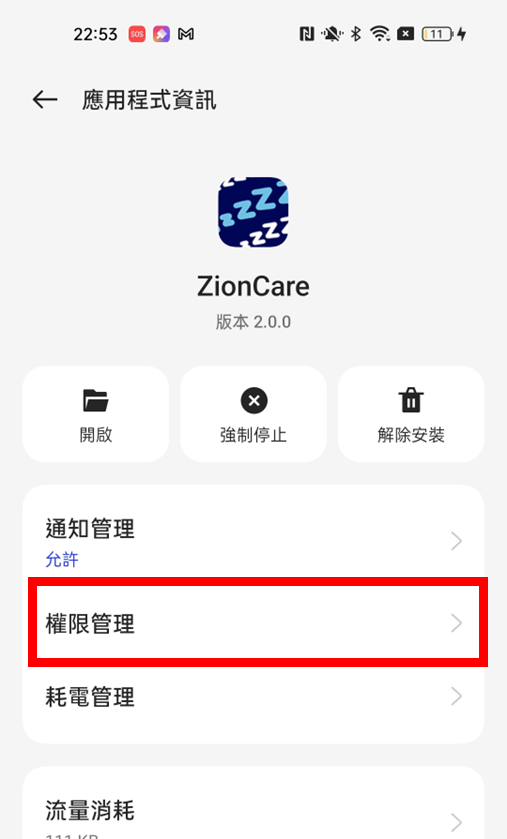
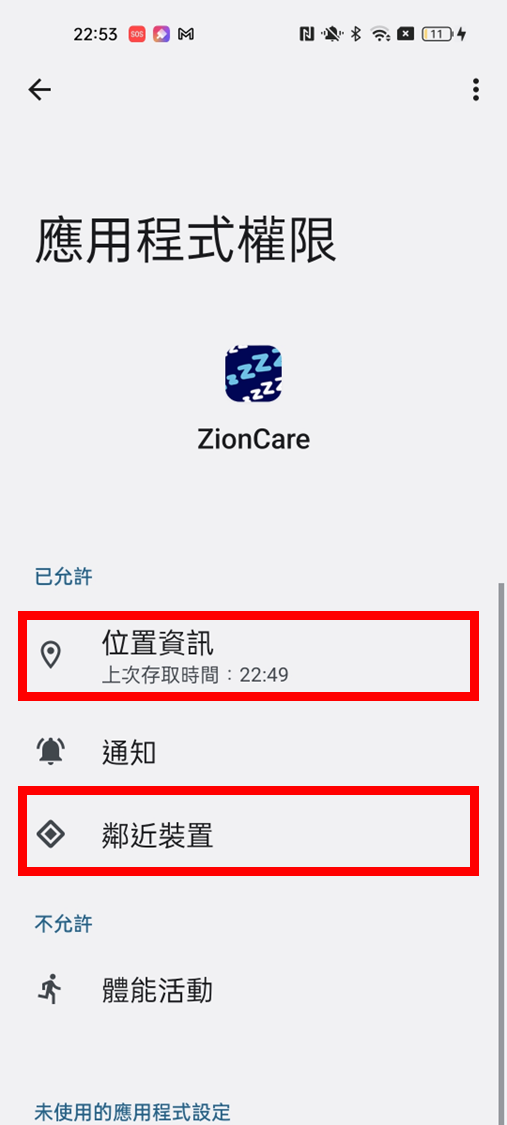
- Just enable the permissions requested by the App.
- Install and open the App in the same way as iOS system.
- But the order will request permission first.
- Then login again.
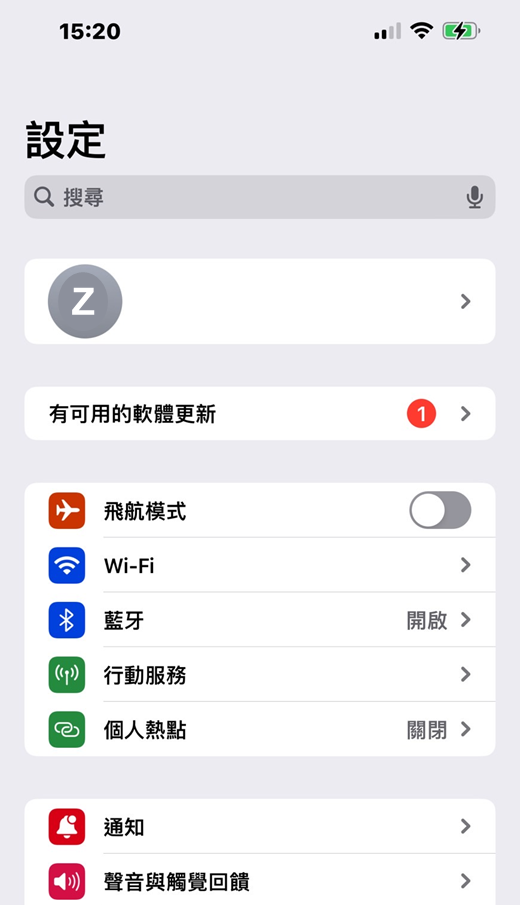
- 開啟ZionCare App後,請確認有將藍芽開啟。
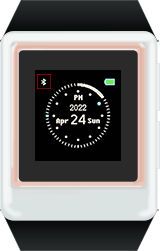
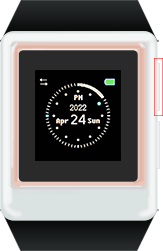
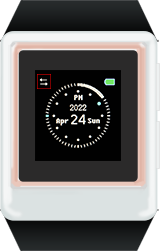
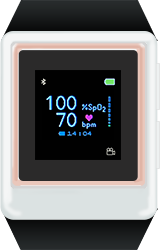
- 另一方面也記得開啟裝置的藍芽左上方可確認開啟狀態。
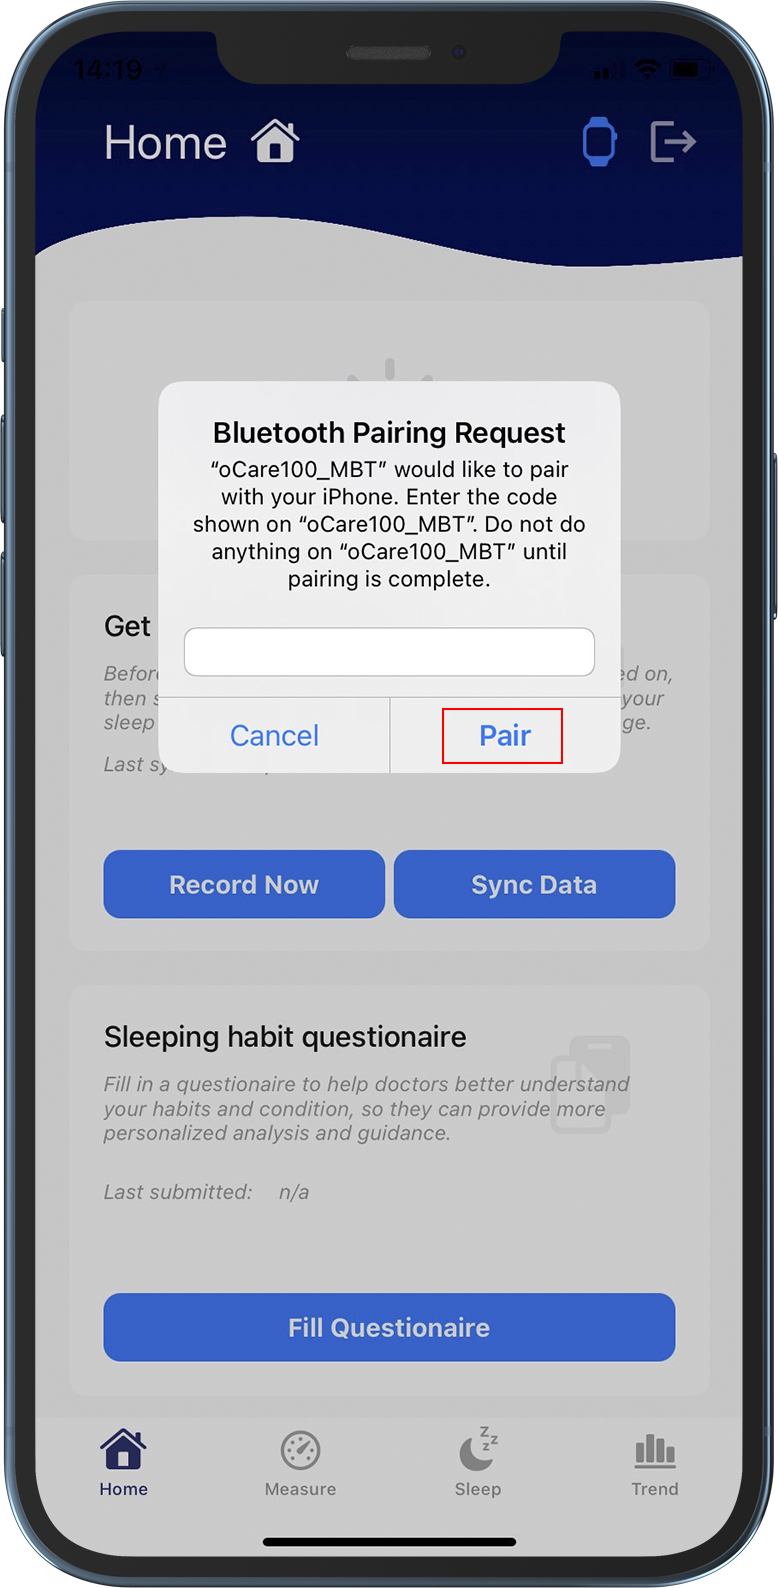
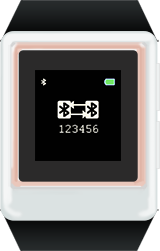
- 此時App會自動偵測裝置裝置連接後會出現配對碼,輸入完畢送出即可完成配對。
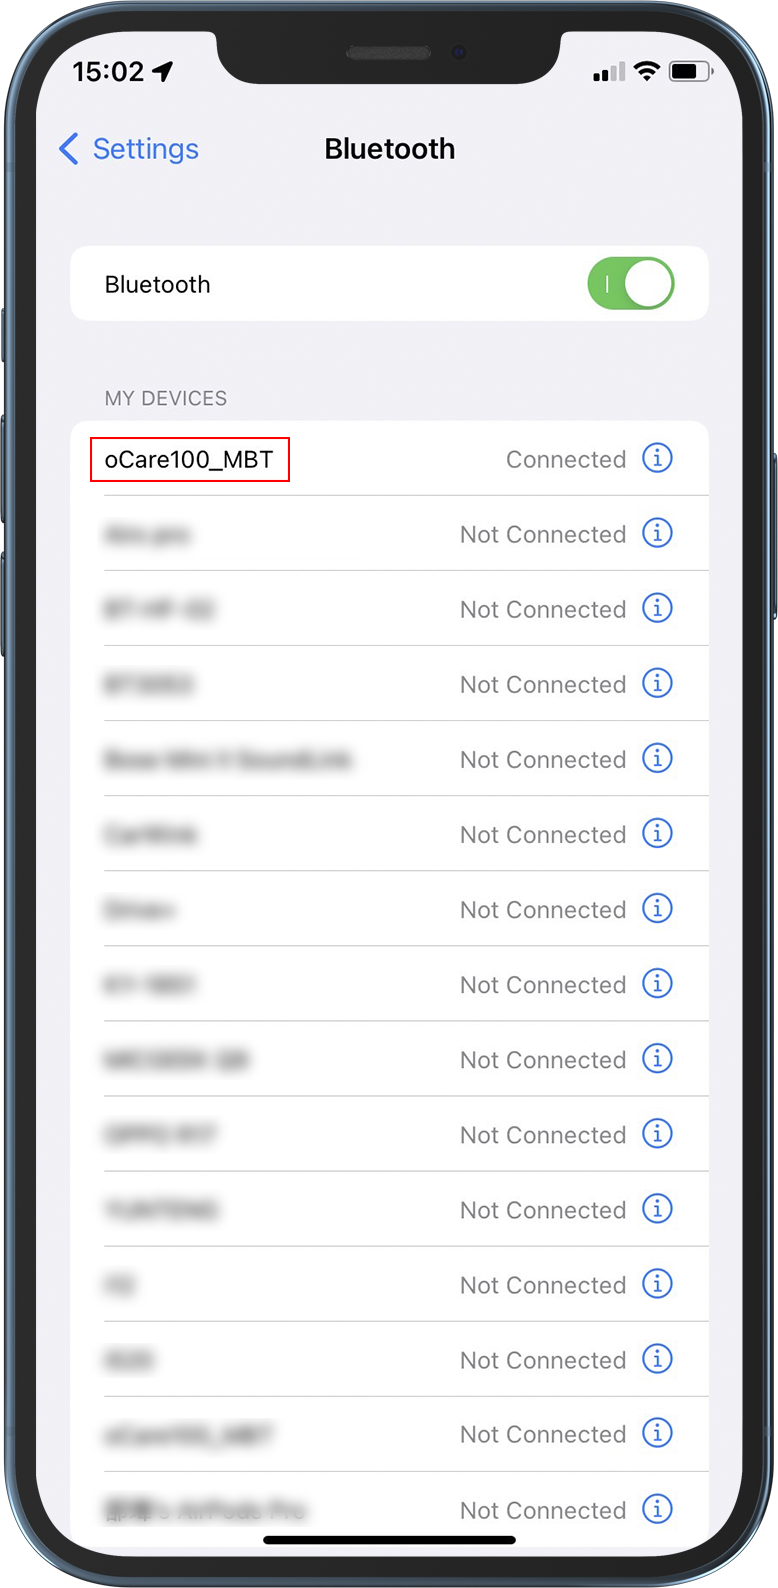
- 完成后手機將會出現已經連接訊息,裝置左上方則出現連接圖示。
- iOS開啟藍芽的方式亦是如此。
- Then return directly to the ZionCare App and the system will automatically search for the device name.
- Confirm that the phone and device icon are connected.
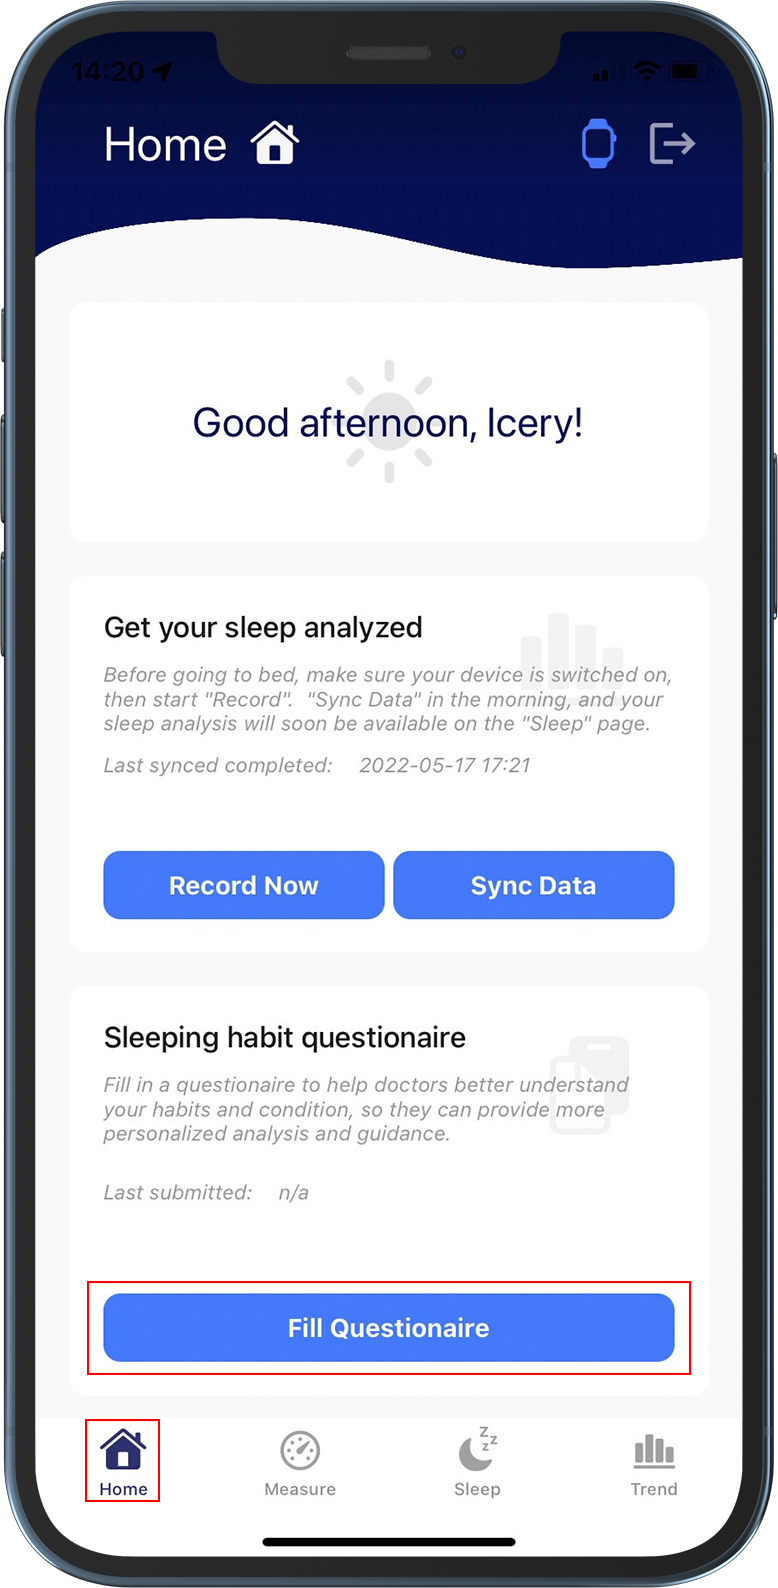
- 在首頁選擇裝置確認已連接並點選選擇按鍵。
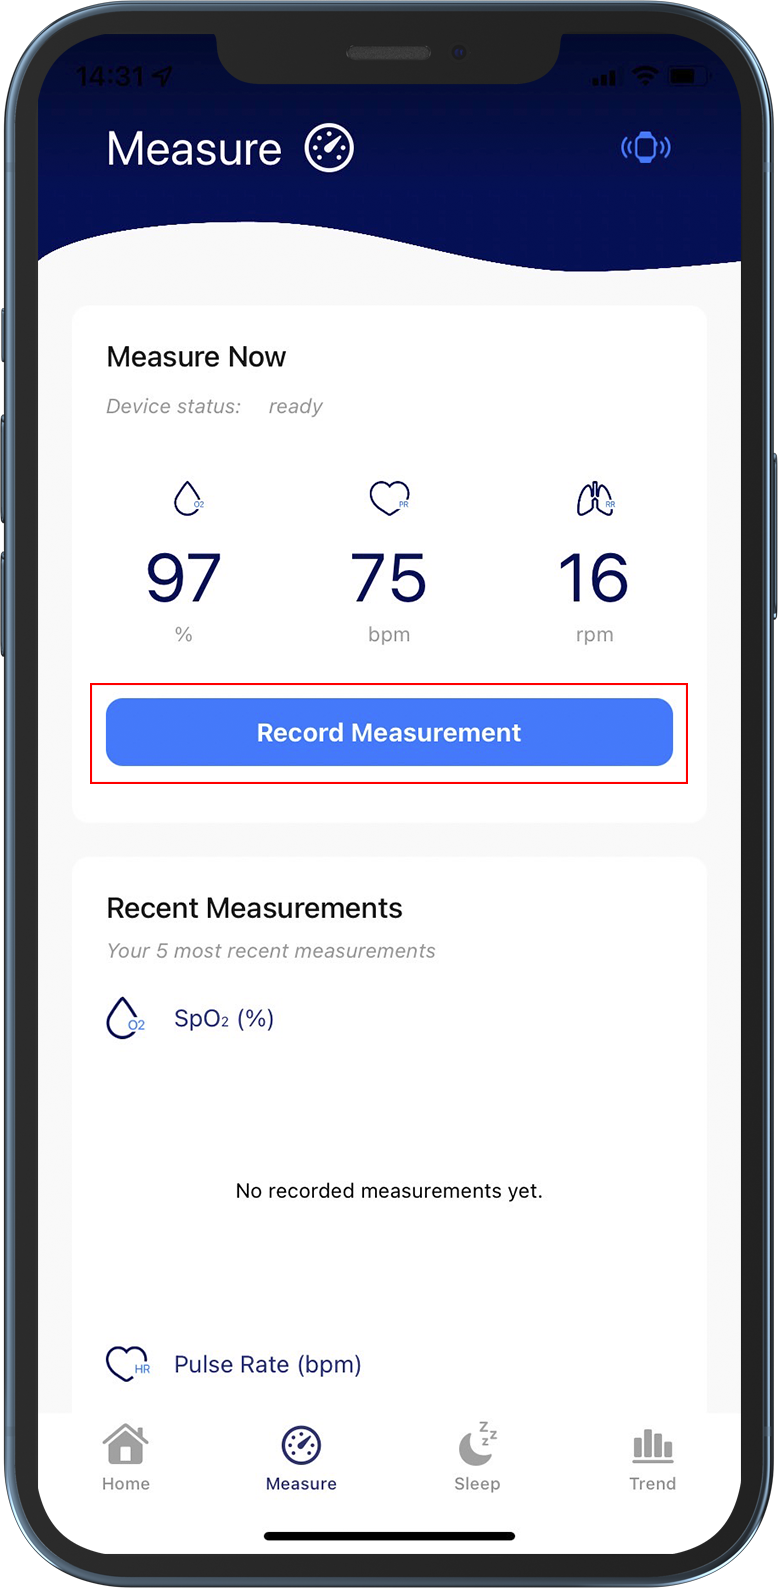
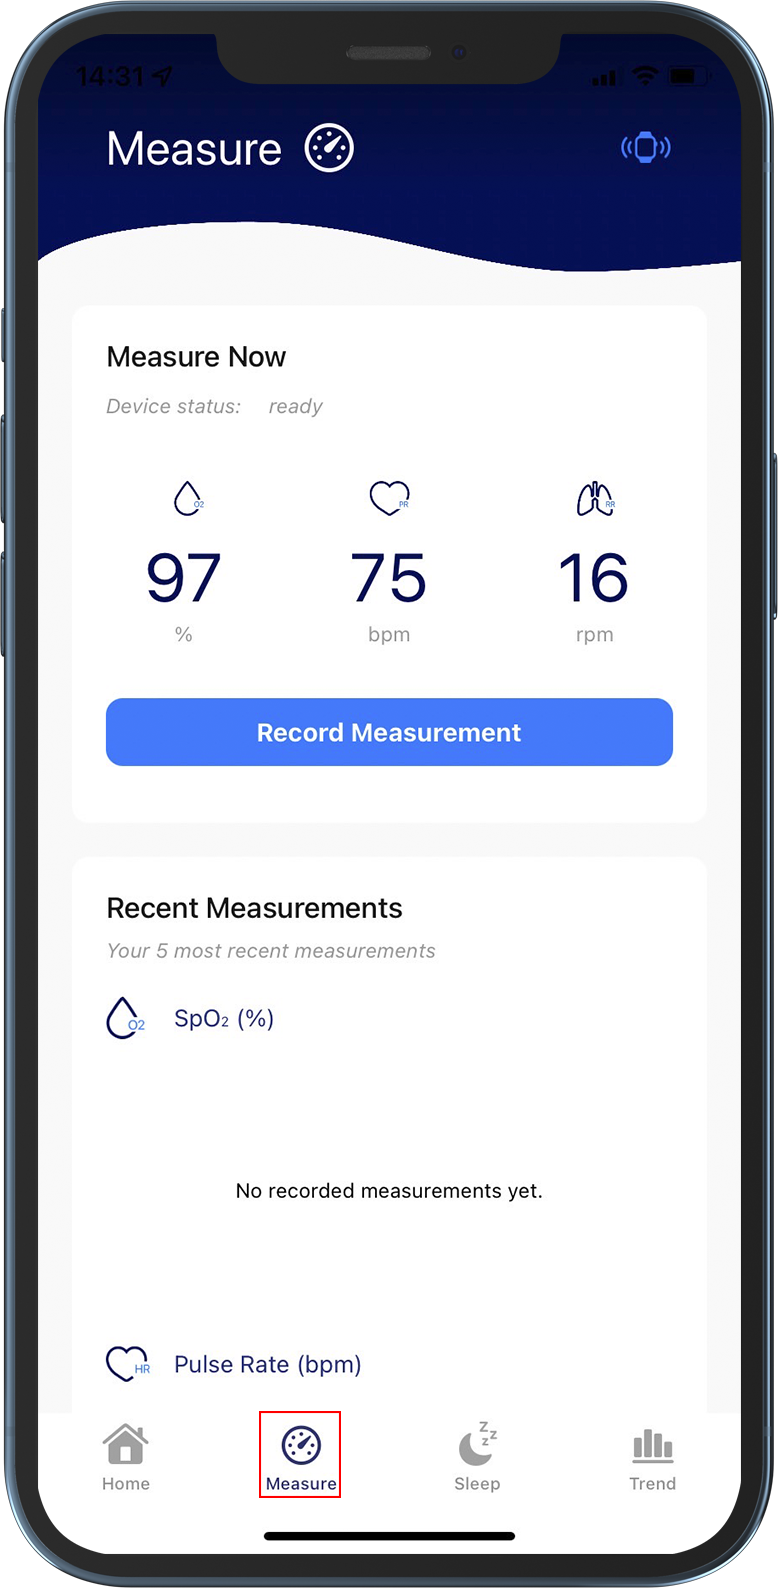
- 滑至下方點選記錄測量來即時量測。
- Please keep your body stable for 5 seconds after starting the measurement.
- After the measurement is completed, you can see the data immediately, and click OK to return.
- Click on the card below to record and measure resting heart rate.
- Please keep your body stable for 1 minute after starting the measurement.
- 量測完畢後會自動返回量測頁面,並顯示靜止心律數據於下方卡片。
- Click on your personal page and scroll to the bottom.
- 依序填寫三份問卷 (STOP BANG、ESS、ISI), STOP BANG問卷可評估睡眠呼吸中止症,ESS問卷可評估嗜睡程度,ISI問卷可評估失眠程度。
- After filling in, you can see the last submission timestamp. If you make a mistake, you can refill it.
- 確認ZionCare App已與穿戴裝置藍芽連接,並點選選擇按鍵。
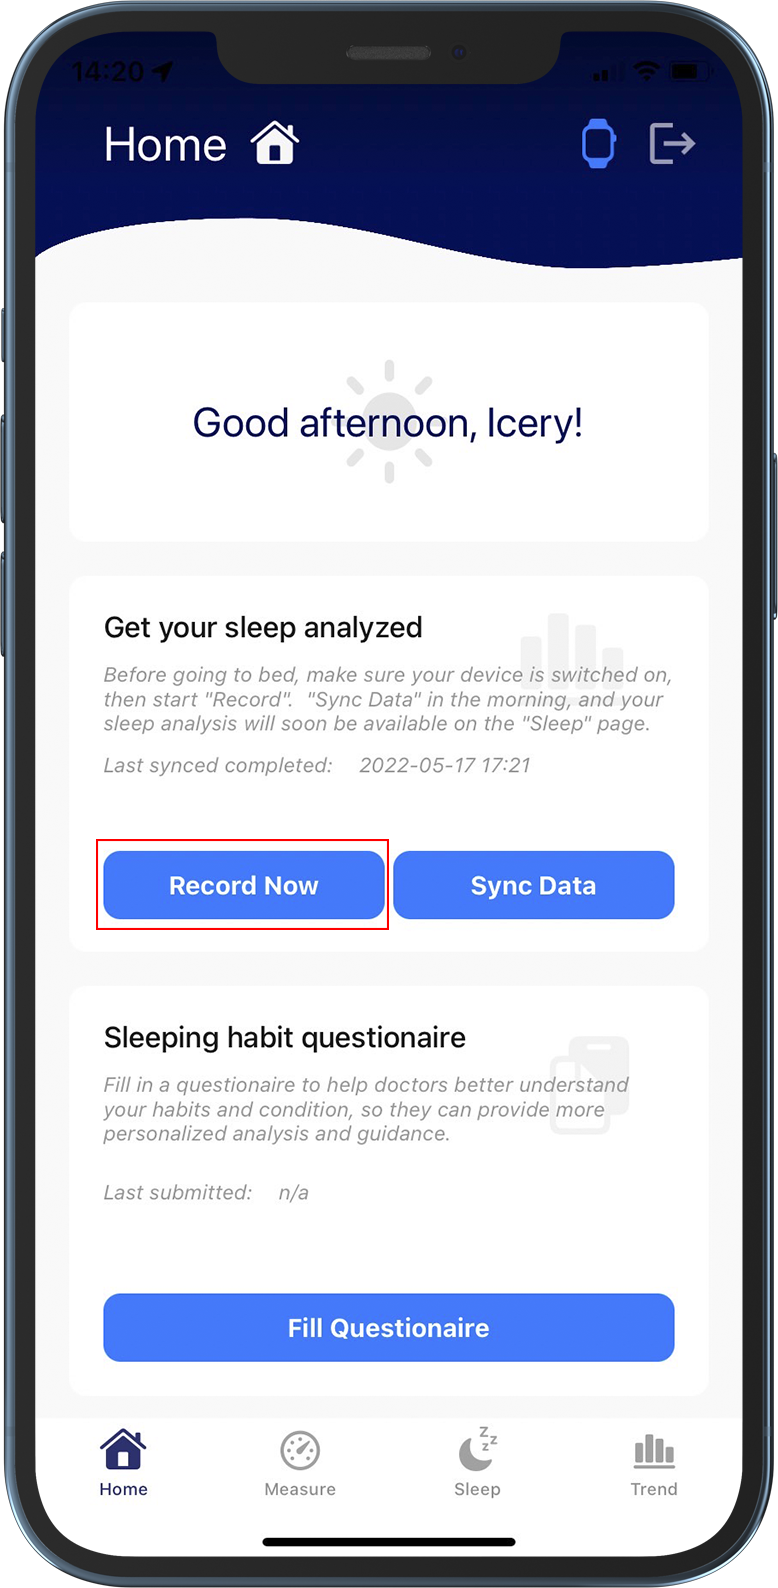
- 點選記錄睡眠即可使穿戴裝置進入記錄模式,點選OK後可移動手機或關閉手機,隔日同步數據再次開啟即可。
- There is no icon in the lower right corner of the wearable device before it enters recording mode.
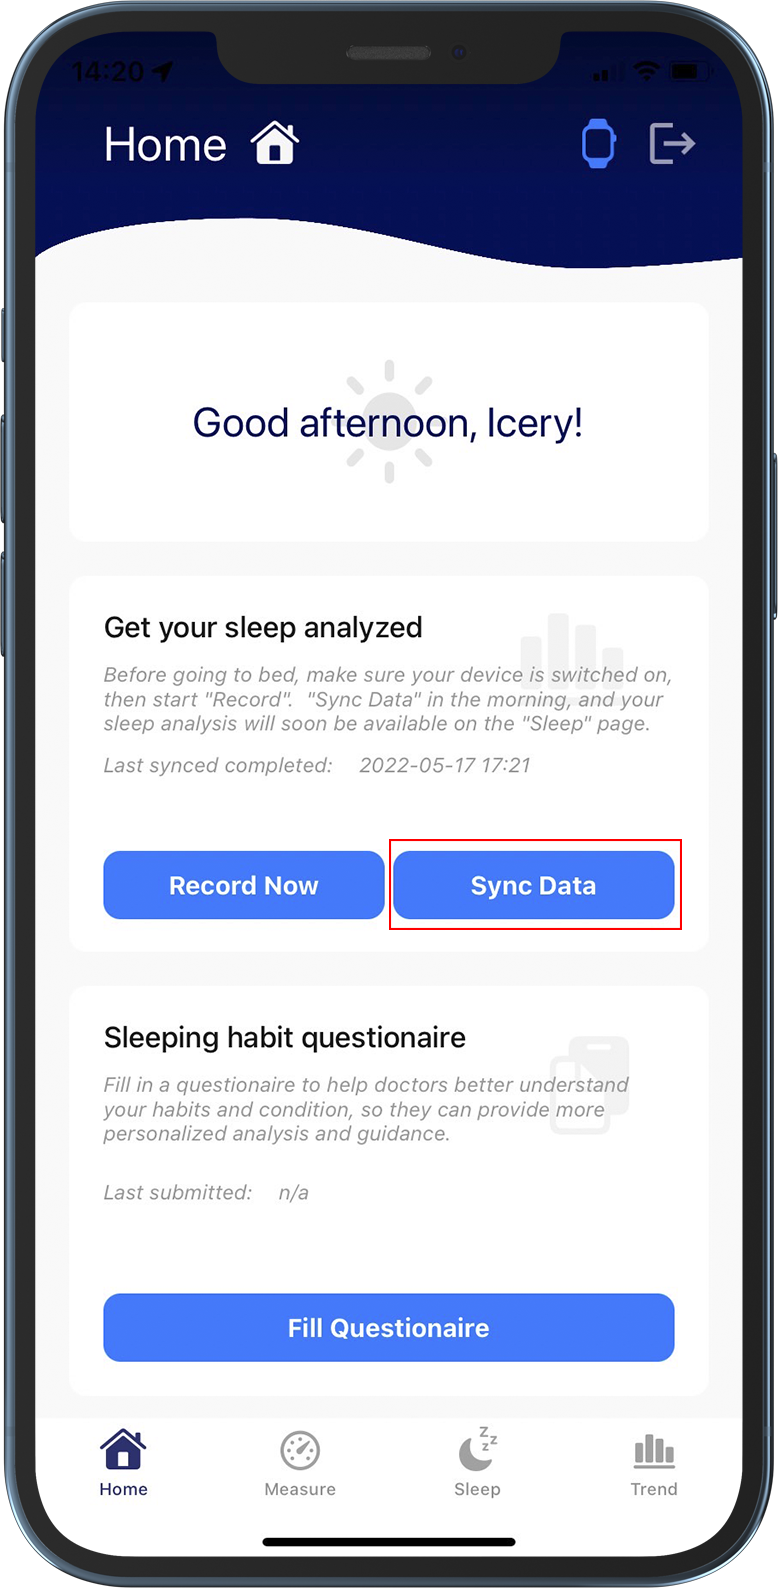
- 戴著穿戴裝置睡一晚後,在首頁選擇裝置。
- 選擇後點選同步數據。
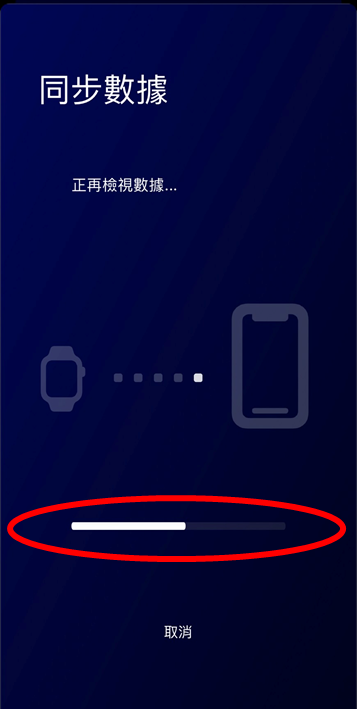
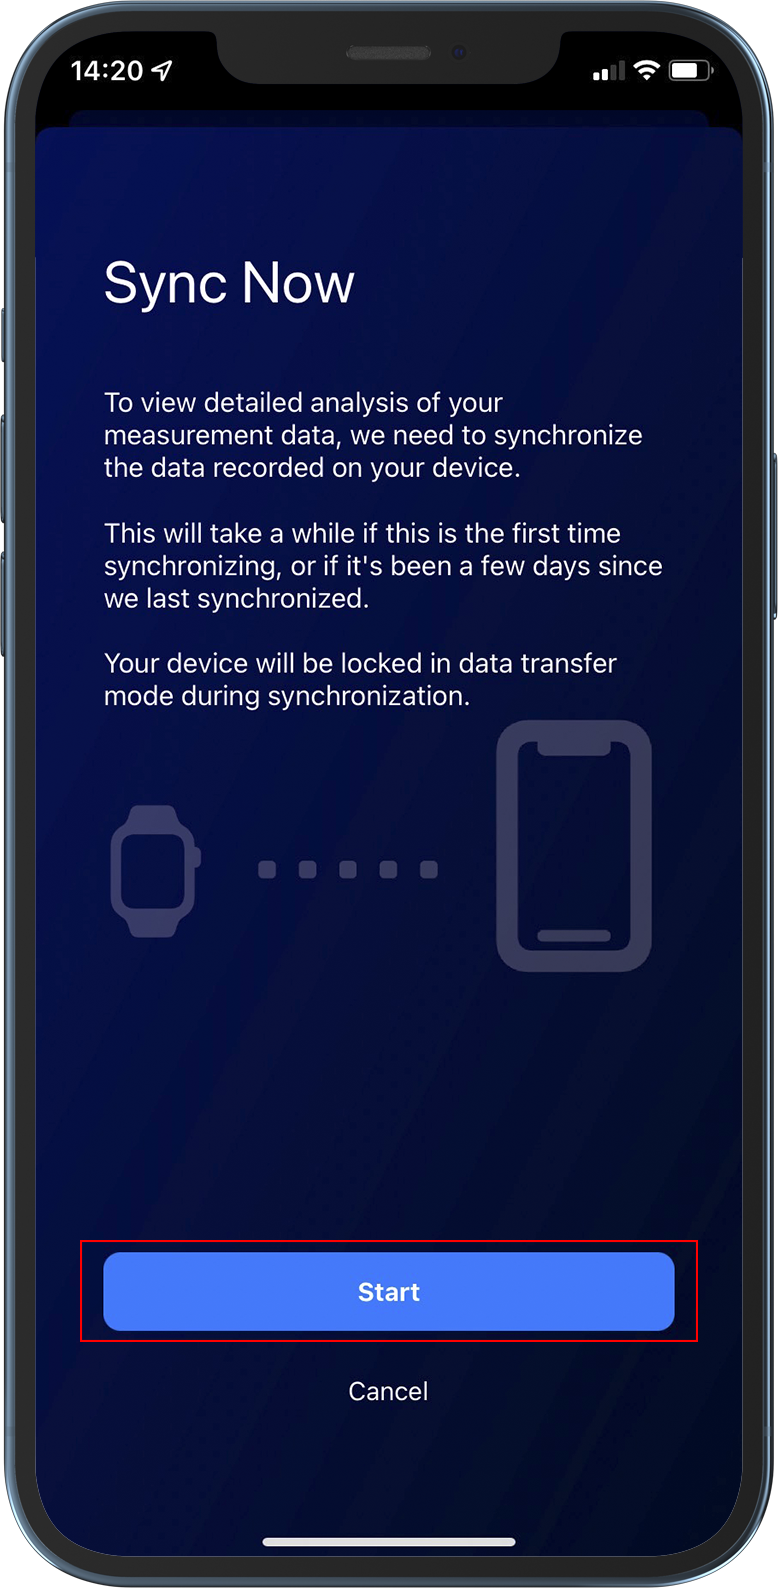
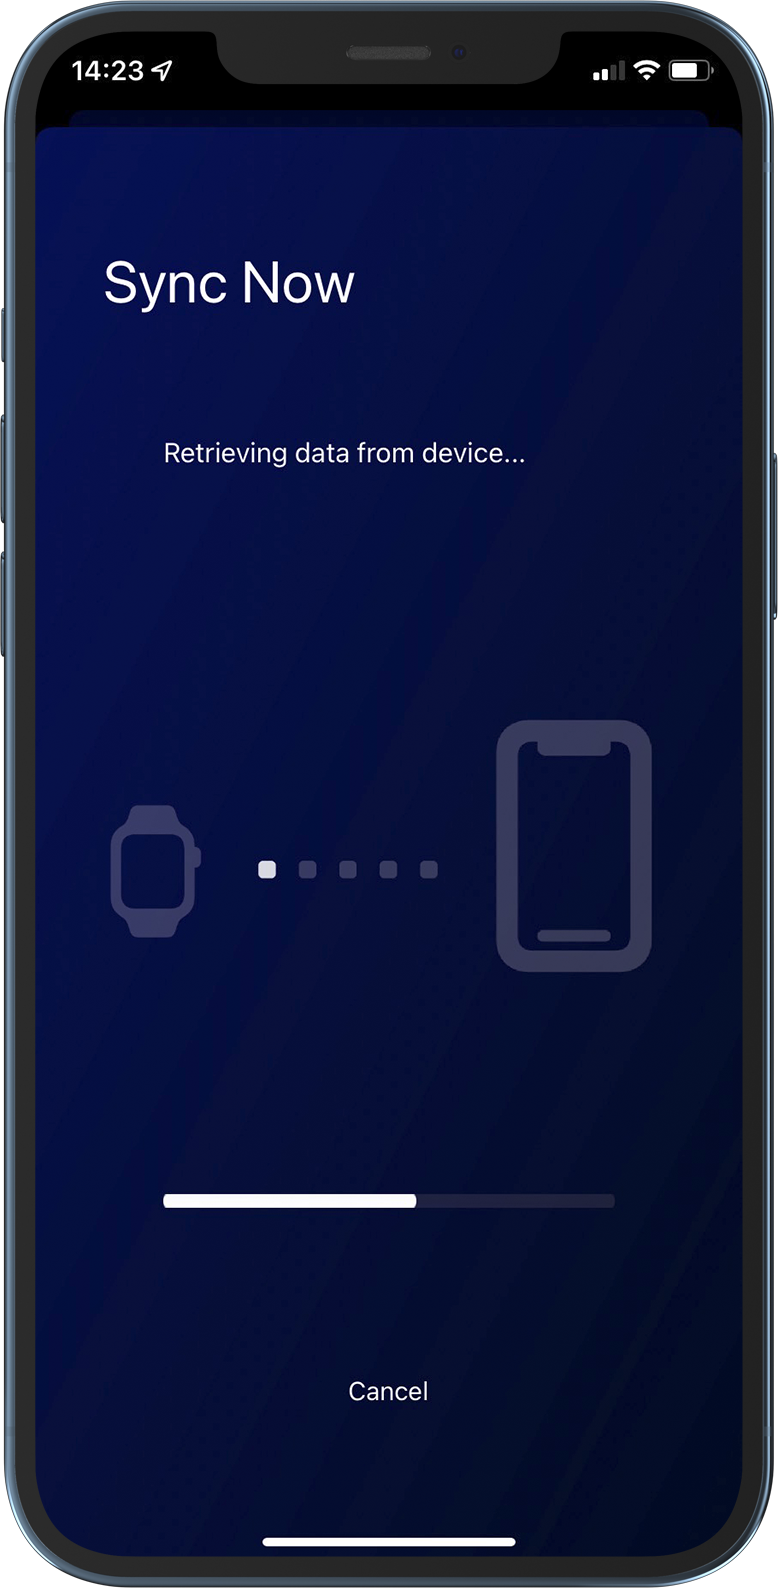
- 點選開始即可開始上傳,期間請勿讓手機離穿戴裝置過遠,穿戴裝置上傳中會顯示下方畫面。
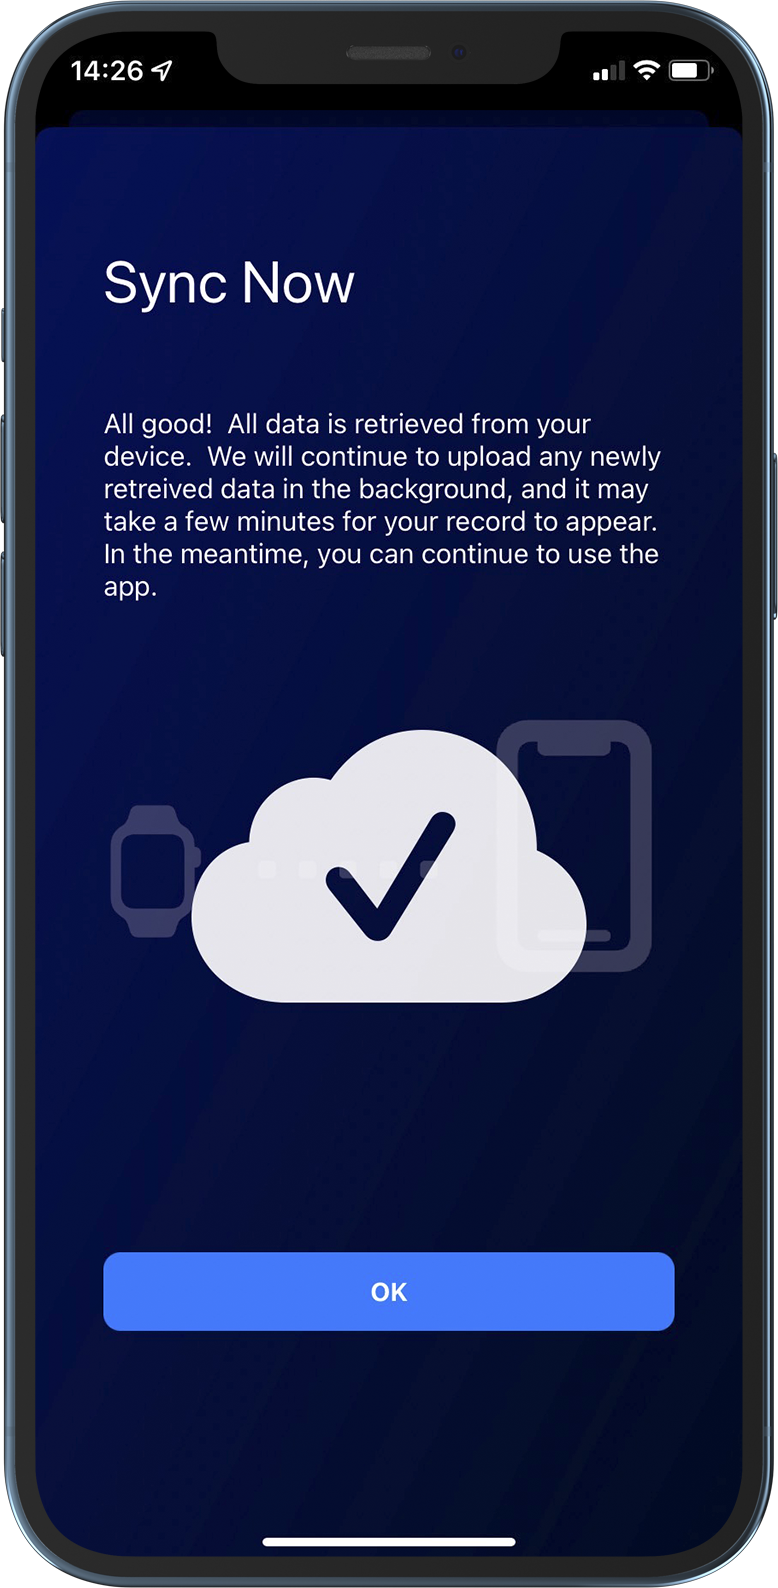
- After uploading, click OK to return.
- 在首頁點擊好眠工具。
- 選取睡眠日誌。
- 點擊日期及新增睡眠日誌。
- 選取要新增的活動並在時間軸上點擊時間。
- 接著會進入活動細節填寫的畫面,填完選儲存即可。
- 資料會暫存並顯示在時間軸上,若活動全部填寫完畢可點下一步。
- 在睡眠頁面裡面可填寫上床至下床等時間,也能記錄睡覺時醒來的次數與時間。
- 完成後一樣選擇下一步即可暫存資料。
- 最後會進入感覺頁面。
- 填寫完畢選下一步,這時暫存的所有資料將全部送出記錄。
- 儲存完畢會顯示上方通知,並立即出現剛剛填寫的所有資訊。
- 展開睡眠資訊可瀏覽睡眠細節,若想修改資訊可點選編輯睡眠日誌。
- 一樣的流程再走一遍即可完成編輯。
- 最後一樣可回到列表確認所有資訊是否正確。
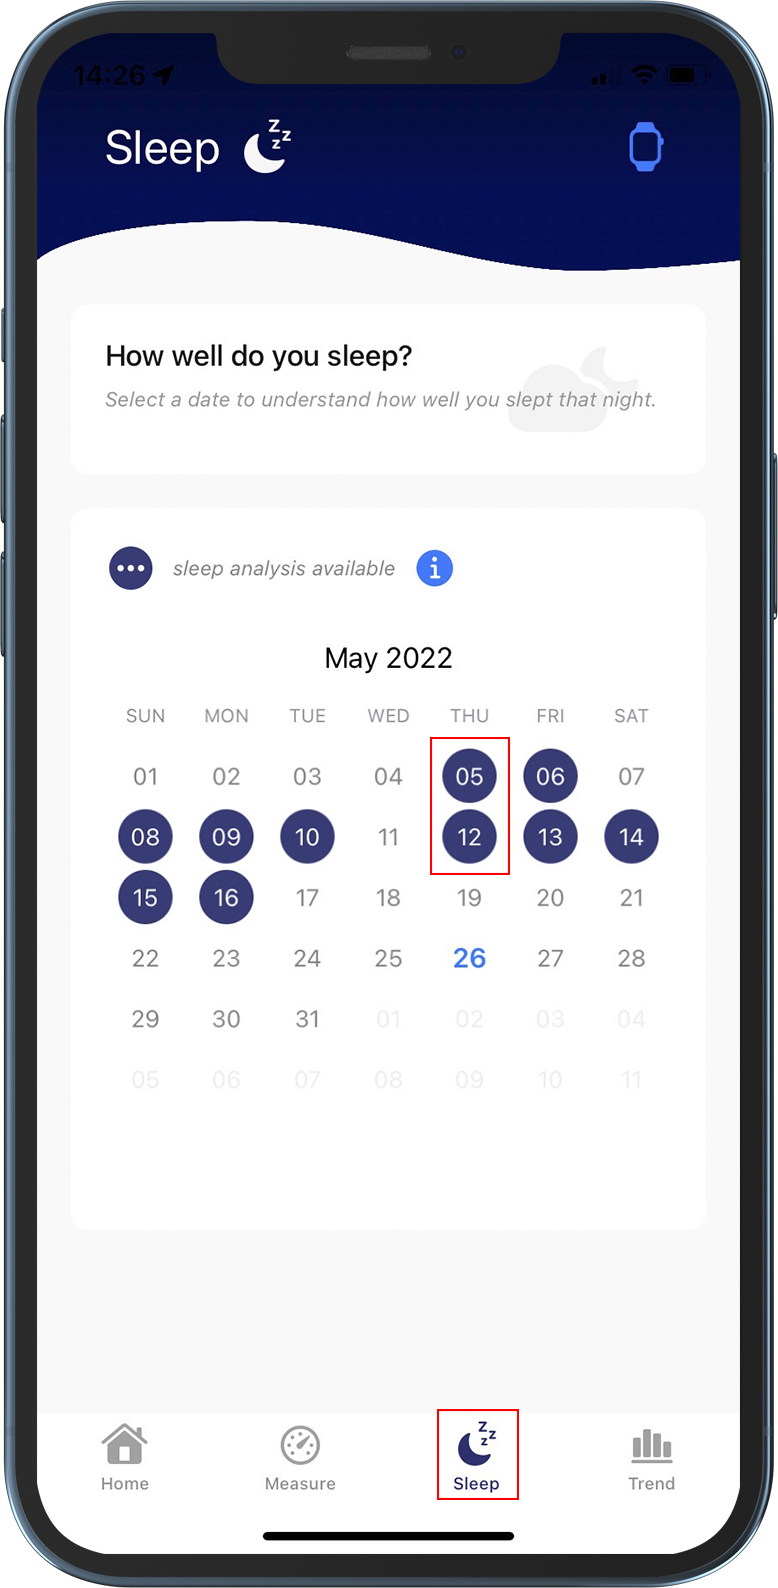
- Switch to the sleep page to view all reports.
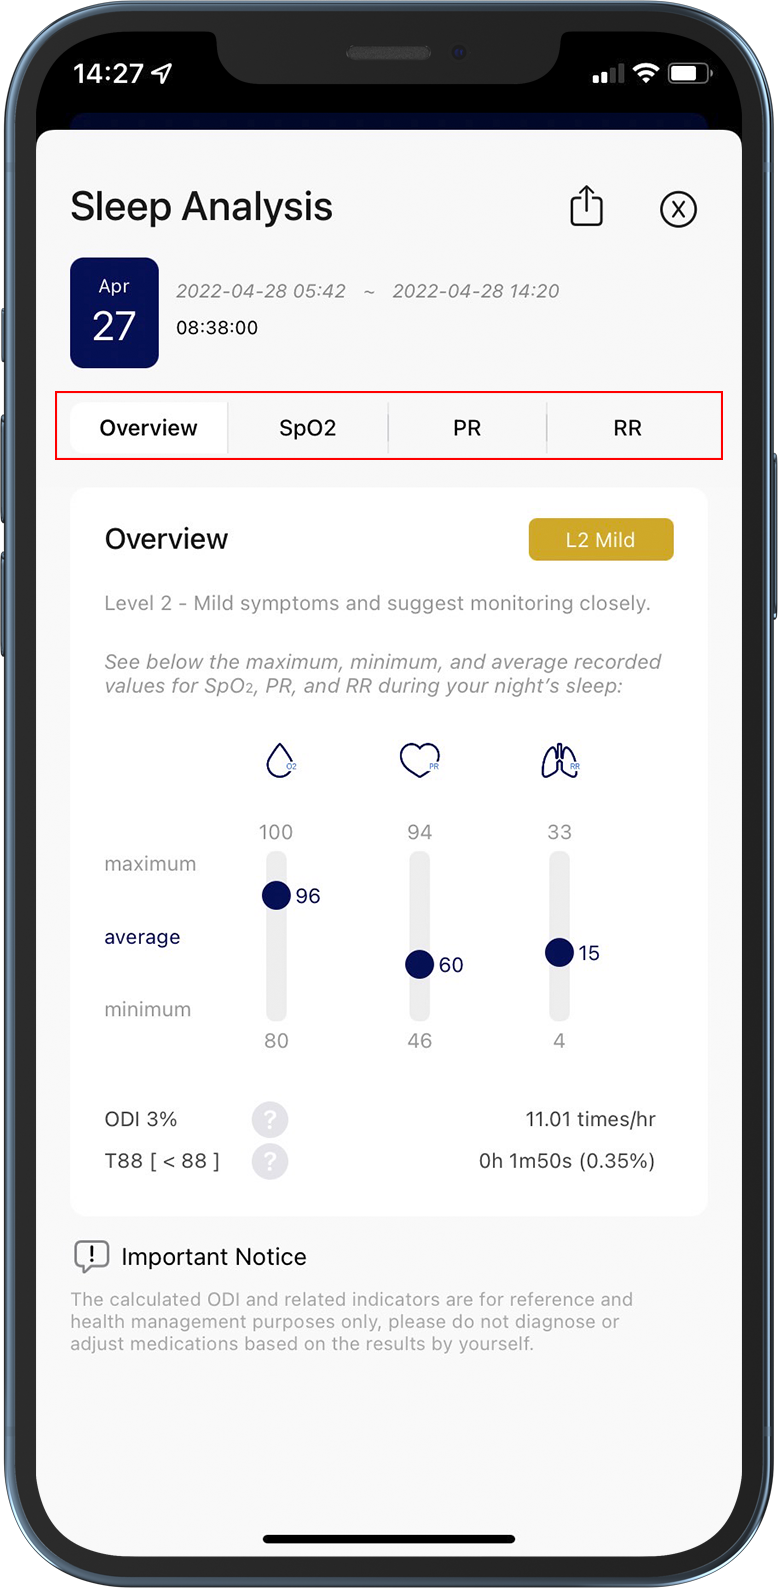
- Click on the date to browse the sleep report content of that day.
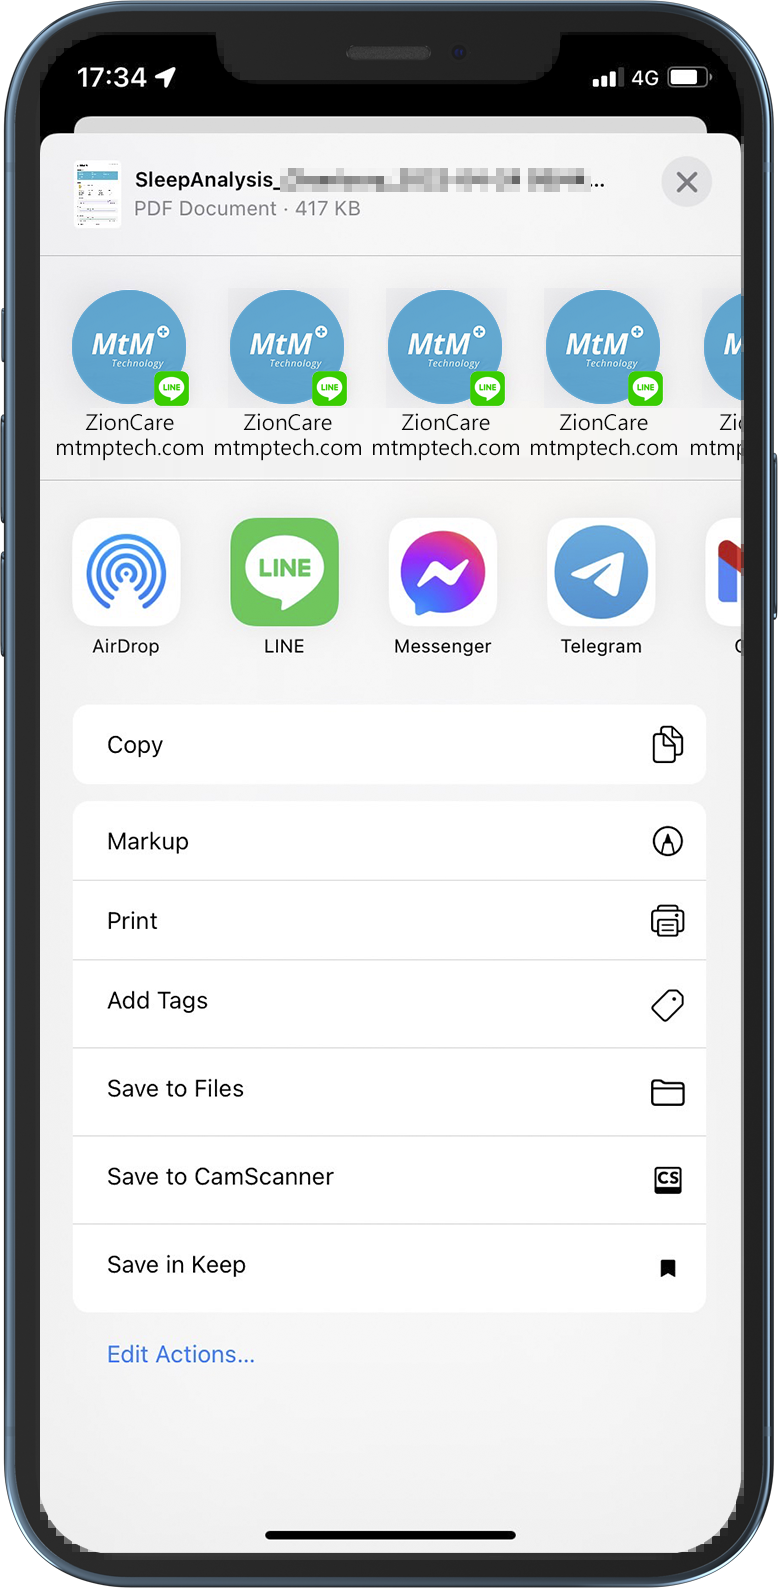
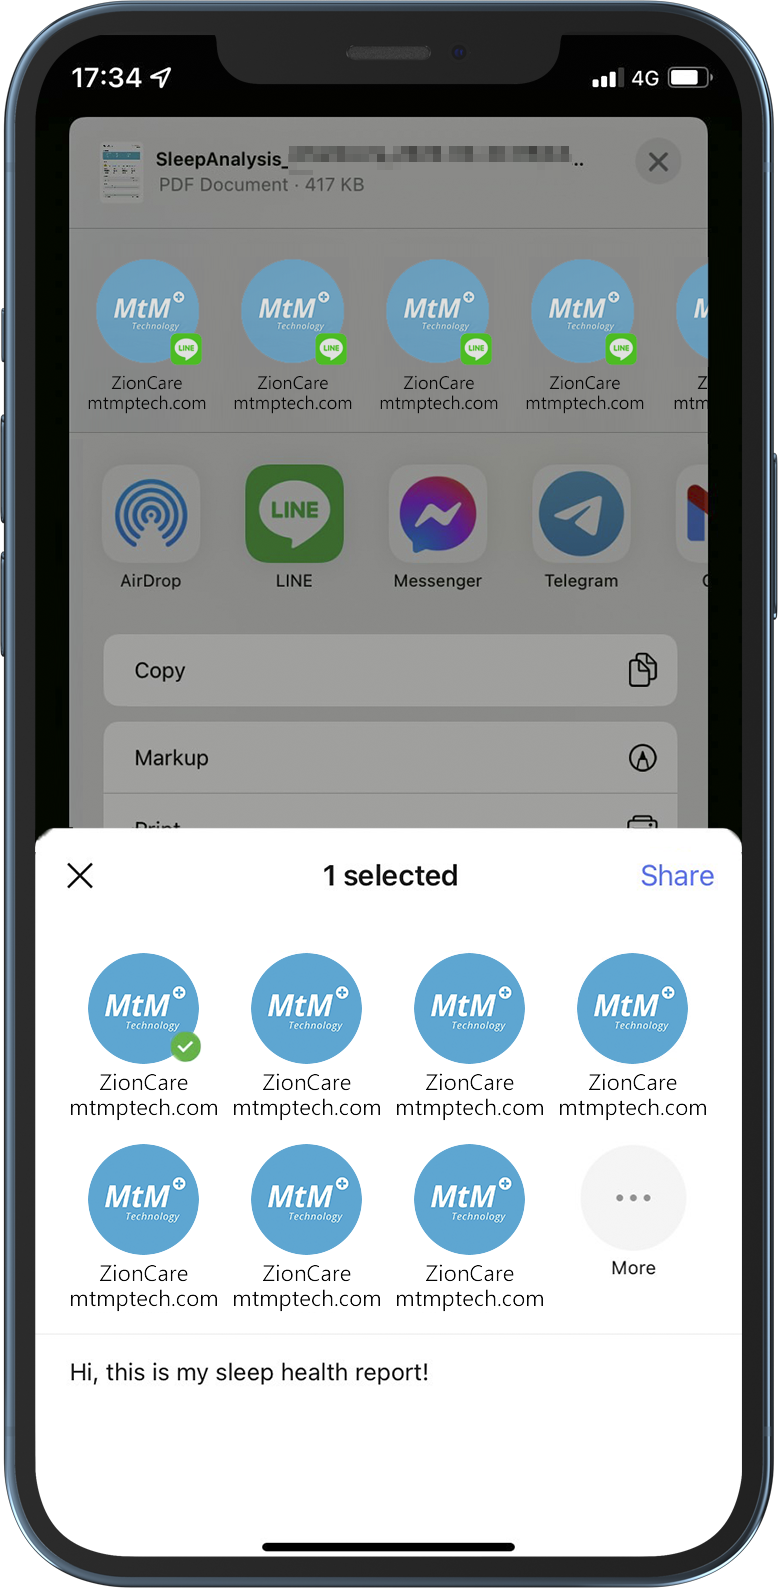
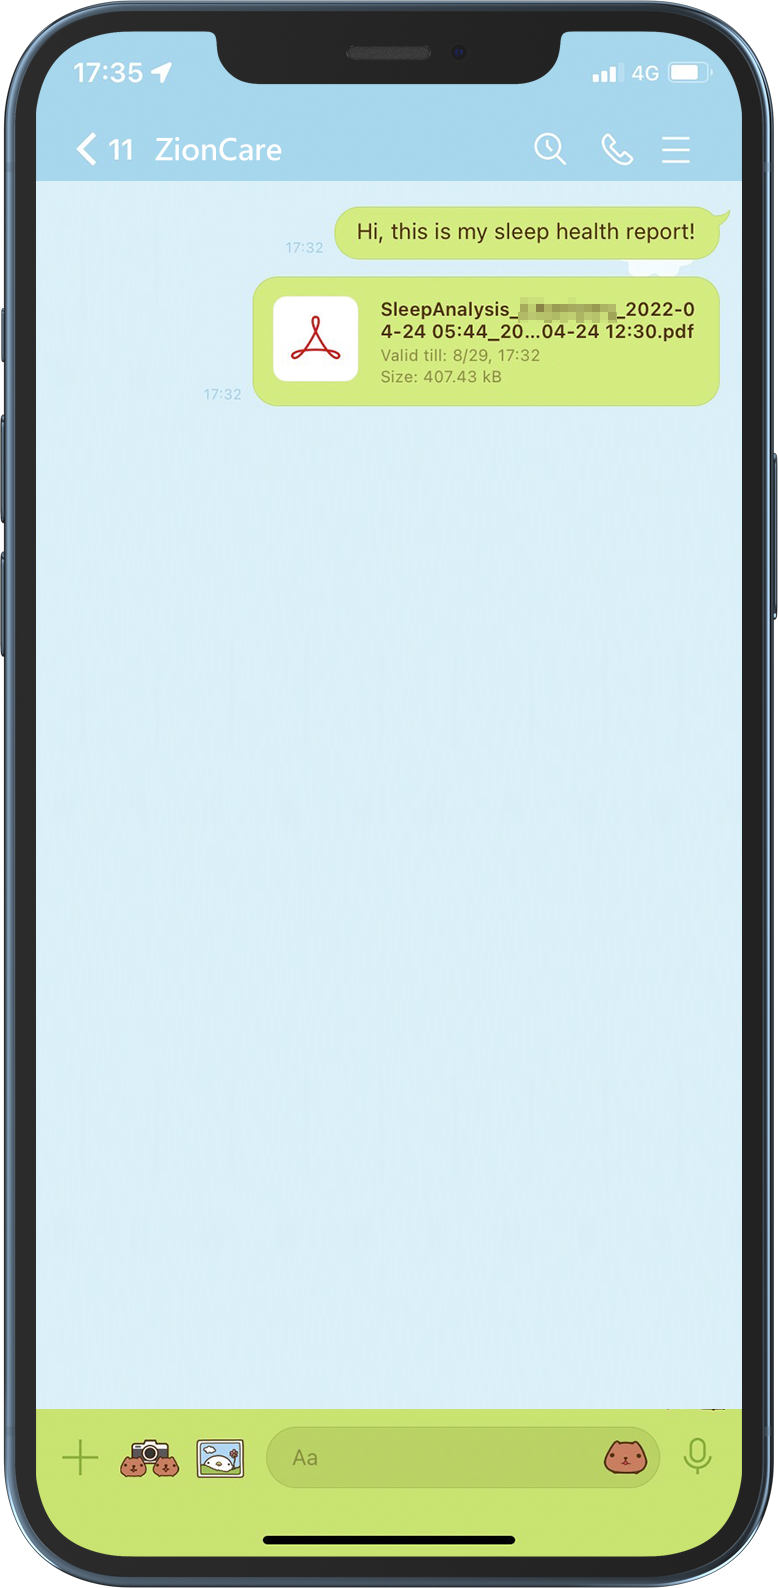
- Click the upper right button to share your sleep report.
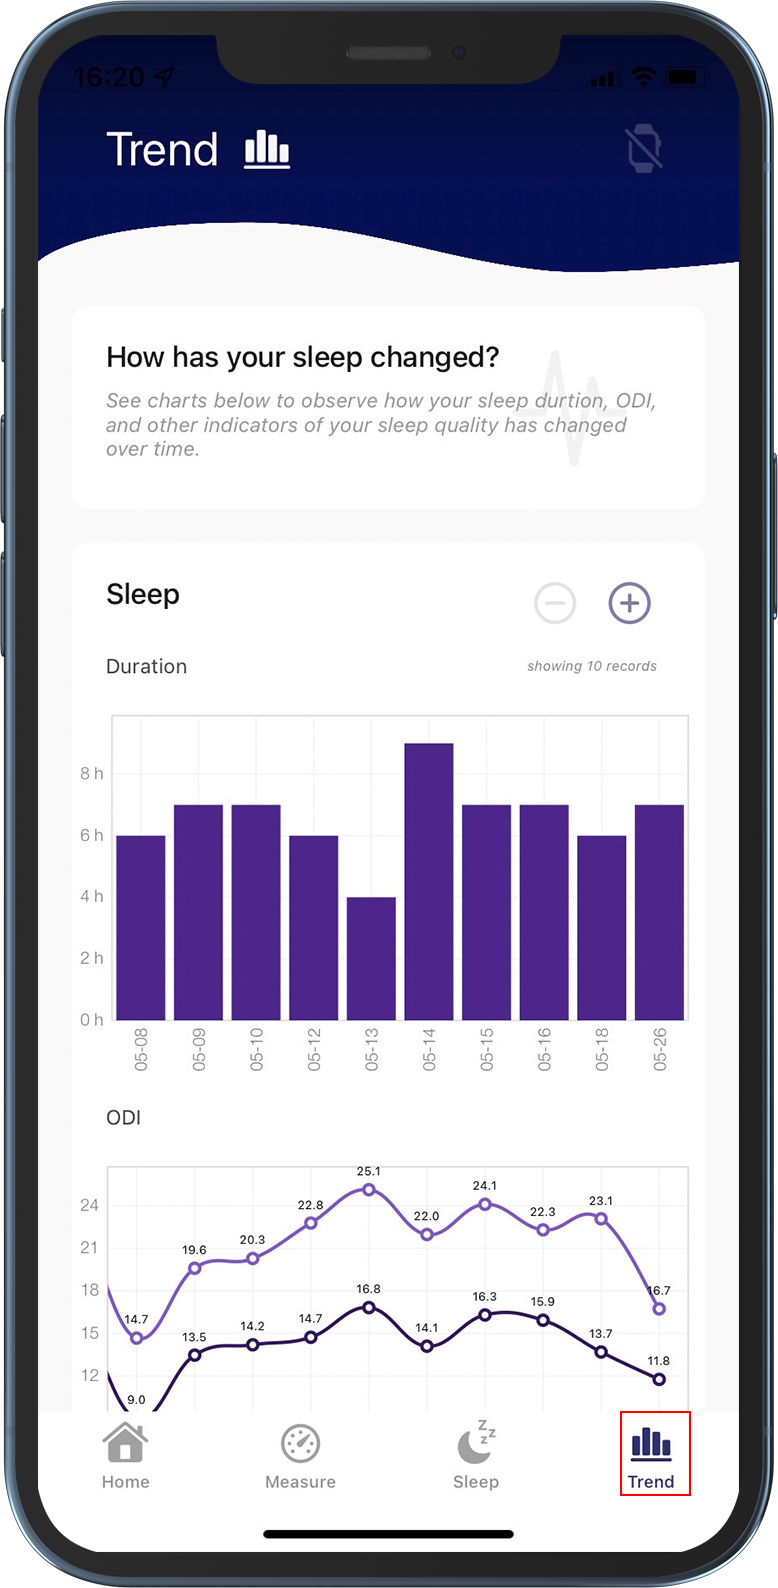
- Switch to the Trends page to browse sleep trends.
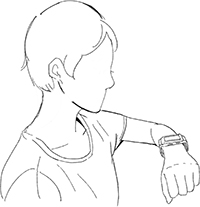
- Adjust the band at a suitable length.
- After wearing it, the back side needs to be close to the skin of the wrist, and it will not move forward or backward with slight shaking to wear it correctly.
- The edge of the watch should not extend beyond or cover the ulnar styloid process.
- 將錶帶稍微調鬆,並從側邊找到卸除卡扣。
- 卸除後可找到充電口,將Micro USB 傳輸插入即可充電,大約3小時可將裝置充滿電力。
- Just put the device back after charging is complete.
FAQ
After logging in, it shows that there is no network.
To use this app, you need to maintain an internet connection, especially to synchronize data and get sleep reports. If there is no internet connection, you will not be able to retrieve your data from the database. You can also connect via WiFi if you have no internet access.
Can't start sleep log from app.
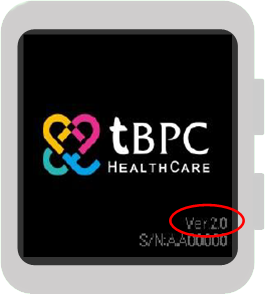
Please restart the wearable device, and check the wearable device serial number (ver: X.XXX) after turning it on. If your version is lower than 5.202, you cannot start the sleep record through the app, please contact customer service to update it for you.
藍芽配對問題
如何排除oCare Pro 100無法自動在App內完成藍芽配對問題?
當您同時開啟oCare Pro 100及App時,若二者無法自動完成藍芽配對, 請按下列步驟操作:
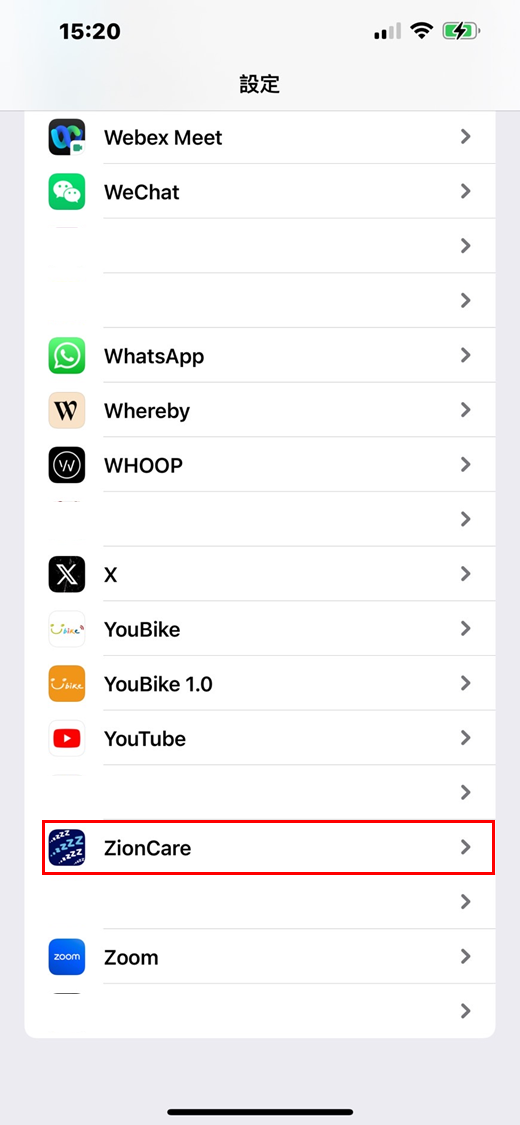
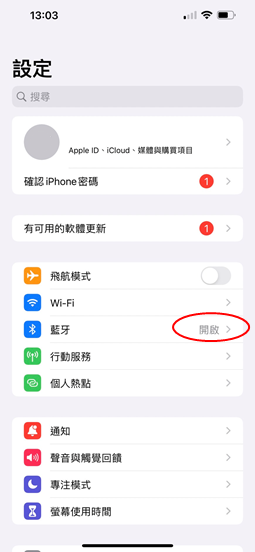
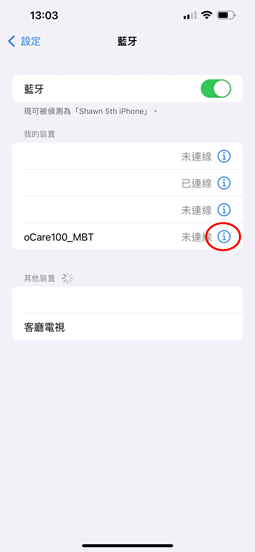
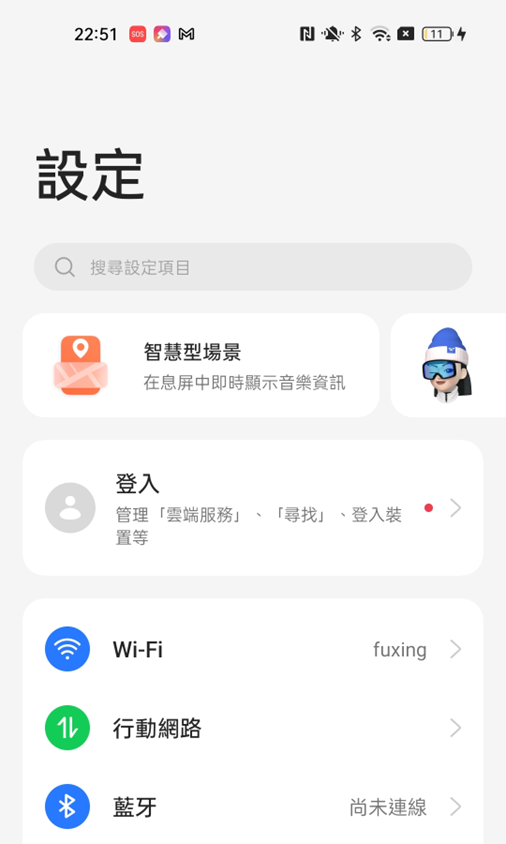
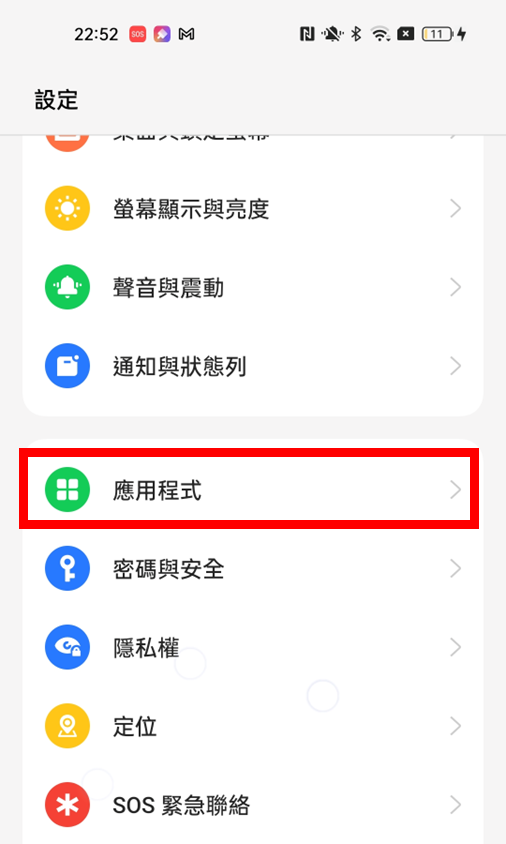
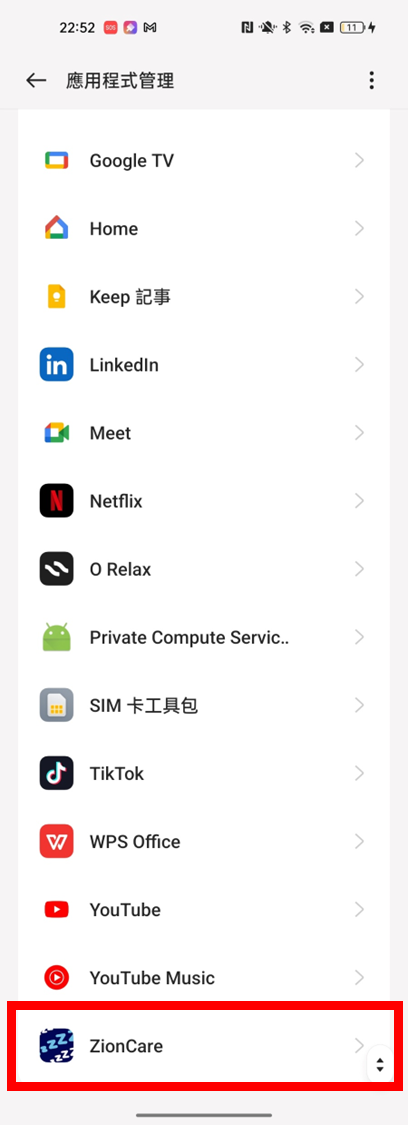
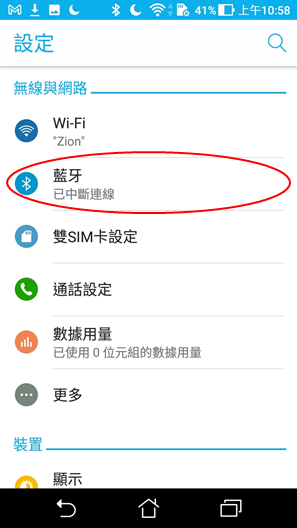
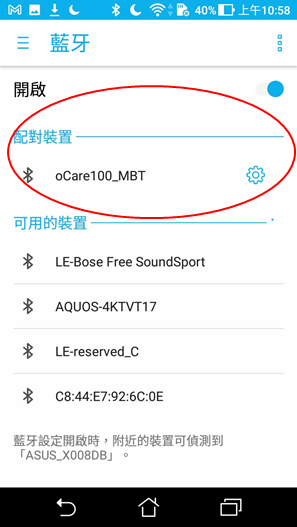
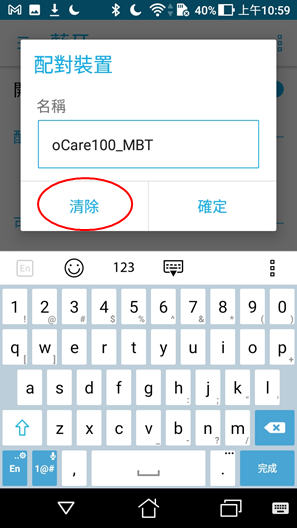
接著,請確認手機的藍芽是否已開啟,若oCare Pro 100及手機藍芽皆已確認開啟,仍無法配對連線,請接續按下面步驟操作:
iOS手機
Android手機
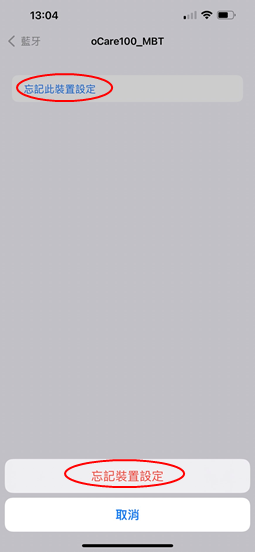
若嘗試過上述步驟後, 仍有App及oCare Pro 100藍芽配對連線問題,請再按忘記裝置重新配對步驟操作。
睡眠資料記錄問題
為什麼需要同意授予位置權限當使用oCare Pro 100和Android裝置進行藍配對?
任何藍芽裝置和Android手機連線時,Android系統會要求同意授予位置權限作為隠私保護。由於oCare Pro100使用藍芽傳輸資料,ZionCare App於Android上使用時因此被迫要求取得同意授予位置權限。ZionCare App 不會主動要求任何非必要的隠私同意許可。
1. 如何排除同步數據時等待時間過長問題?
正常情況下,6 ~ 8小時的夜間睡眠記錄,約需3 ~ 5分鐘的上傳時間。成功完成資料上傳後,oCare Pro 100內的資料記錄會被完全清空。因此,若未每日定時進行資料上傳,而是累積多天的資料才進行資料上傳,則需等待較長的時間,並視累積資料的天數,決定等待時間的長短。
若是同步數據畫面底下的資料讀取進度白色長條,長時間停留在相同位置,請將App完全關閉(不要在背景執行),手錶關機,再次開啟App,待App進入到首頁畫面後再將手錶開機,重新執行同步數據流程。
2. 為什麼同步數據後,在睡眠功能項下沒有資料?
- 手錶記錄功能未被開啟:
睡前配戴手錶後,請確認手錶的記錄功能已被開啟,手錶視窗右下角出現攝影機圖示,表示記錄功已開啟,手錶所量測到的資料皆會被保存在手錶的記憶體內。若手錶視窗右下角沒有攝影機圖示,請打開App,在首頁點擊開始記錄按鈕,可開啟手錶記錄功能。 - 睡眠時間低於2小時:
若睡眠時間低於2小時,則無法計算出可供參考的ODI 3%指數,因無法於App睡眠功能顯示分析報告資料。
App問題
How to use the wearable device?
Device wear
Device operation
Wearable check
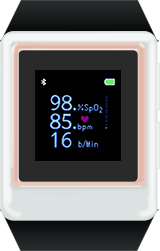
After wearing, please click Record Now through the ZionCare App to enter the measurement mode.
The SpO2 should be between 95%~100%. (Below 90% is considered lower than normal.)
Pulse rate should be between 60/bpm~100/bpm.
Respiratory rate should be between 12/rpm~16/rpm.
Get the best results
The way of wearing is the link that most directly affects the monitoring results, please pay attention to these points:
- When wearing, confirm the tightness of the wearing, and ensure that the wearing device is in parallel with the skin to improve the monitoring accuracy.
- The wearing position should be behind the wrist bone. If it cannot fit the skin, it can be moved to the upper part of the arm.
- The ZionCare wearable device is a monitoring device specially made for sleep, and the monitoring should be done during stillness or sleep as much as possible.
For a small number of users, some factors may cause the measurement to be inaccurate:
- Skin blood flow, if the blood flow is too low due to the surrounding environment, it may affect the monitoring of blood oxygen concentration, such as too cold in winter.
- Skin changes, such as temporary or permanent skin changes such as tattoos, may also affect the monitoring results of the wearable device.
- If the body movement is not still and relaxed during the measurement, it will also make it difficult for monitoring to judge the current physical condition, such as arm force, shaking, etc.
- The heart rate is too high. If your pulse rate at rest is higher than 150/bpm, it will not be able to monitor effectively. Normally, it should be between 60/bpm~100/bpm.
How to install the ZionCare application?
Install the application
Enable bluetooth transfer permission
Create an account
Fill in the account information
Sign in
How to connect the wearable device to the application?
Device pairing
Turn on the wearable device and the app, and confirm that the Bluetooth function is turned on, and the device can be automatically connected via Bluetooth. The first pairing requires a 6-digit verification code, which will be displayed on the screen of the wearable device. , enter and click to match.
Help:
- How to use the wearable device?
- The wearable device cannot be connected.
Device connection
If the connection is successful, you can see that the bluetooth symbol on the upper left of the wearable device turns into a double arrow symbol, and the wearable device icon on the upper right of the app will also switch to blue. If only the bluetooth symbol is displayed, it means that the wearable device has turned on the bluetooth. function, but not connected to the app, just open the app and keep it connected.
Help:
- How to use the wearable device?
- The wearable device cannot be connected.
How to record sleep and get reports?
Record data
You can start recording data through the menu of the wearable device, or through the start recording button on the home page of the application. If you enable it through the application, please make sure that the wearable device is connected.
Help:
- How to use the wearable device?
- The wearable device cannot be connected.
Synchronous data
After data collection is complete, you can go to the homepage of the app and click the Sync Data button to upload. At the same time, the wearable device will display the uploading icon. Please do not interrupt the operation at this time, and please keep the connection during the operation.
Help:
- How to use the wearable device?
- Sync data waiting too long.
Start sync
Sleep Report
Detailed data
Report share
Sleep trends
Set measurement
Record measurements
Fill out the questionnaire
Troubleshooting
Please make sure that the Bluetooth is enabled on all devices. For Android users, please enable it together with the GPS location.
Wearable device part:
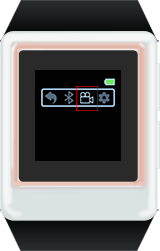
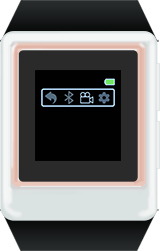
- Check whether the bluetooth symbol appears on the upper left of the wearable device.
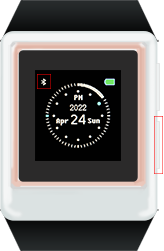
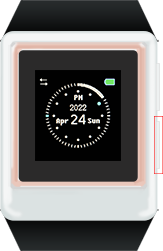
- If not, enter the menu through the lower right button.
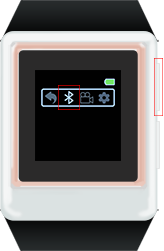
- The upper right button switches to Bluetooth.
- Then turn on the bluetooth through the lower right button.
- Use the upper right button to switch to the return symbol when finished.
- Finally, use the bottom right button to select to return to the main screen.
The device confirms that the bluetooth is turned on and still cannot connect, please follow the steps below to try to connect again
- Close the application completely (including background operation).
- Restart the wearable device.
- Go to Bluetooth settings to find the wearable device name and remove it.
- Follow the instructions to reconnect and pair.
Manual bluetooth connection
There was an error in registering an account.
Sync data waiting too long.
Under normal circumstances, it takes about 3-5 minutes to upload sleep data of 6-8 hours. If you do not upload sleep data every day, it will be accumulated and uploaded in the next synchronization, resulting in uploading. The time is longer, so it is recommended to upload daily to reduce the waiting time, and after uploading the data, the data in the wearable device will be automatically deleted to ensure that the capacity is sufficient for continued access.
If upload status the app is stuck for a long time, please completely close the wearable device and the app (including background operation), then restart the app and sync again.
No data after sync.
- The wearable device does not have recording mode turned on:
Please confirm whether the watch device has turned on the recording mode before going to bed. If it is activated correctly, a camera icon will appear at the bottom right of the watch device. You can also click Record Now on the Home of the app to start the recording mode. The data recorded at this time will be accessed in the watch device, and the data can be synchronized to the application after the recording is completed every other day.
- Sleep data less than 2 hours:
If the sleep time is less than 2 hours, the ODI 3% index for reference cannot be calculated, because the analysis report data cannot be displayed in the sleep function of the app.
After logging in, it shows that there is no network.
To use this app, you need to maintain an internet connection, especially to synchronize data and get sleep reports. If there is no internet connection, you will not be able to retrieve your data from the database. You can also connect via WiFi if you have no internet access.
Can't start sleep log from app.
Please restart the wearable device, and check the wearable device serial number (ver: X.XXX) after turning it on. If your version is lower than 5.202, you cannot start the sleep record through the app, please contact customer service to update it for you.


